


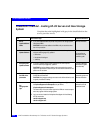
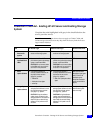

PowerPath Checklist - Existing HP-UX Server and New Storage System
2-29
HP-UX Installation Checklist
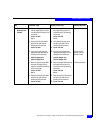
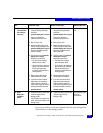
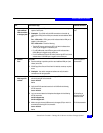
12 Server
Cable additional
HBAs to switches
or storage system
❑
Cable any additional HBA ports to the switch connected to the storage
system or to SP ports.
Storage-system setup
guide
❑
Checkpoint - For a SAN, verify the HBA connections to the switch by
checking the LED(s) for the switch port connected to each additional HBA
port.
For a 1-Gbit switch - LED is green, which indicates that the HBA port is
logged in to the switch port.
For a 2-Gbit switch - One of the following:
• The left LED is green and the right LED is off, which indicates that a
1-Gbit SP port is logged in to the switch port.
• For a DS-xxB2 switch, both LEDs are green, which indicates that a
2-Gbit HBA port is logged in to the switch port.
• For a DS-xxM2 switch, the left LED is blue and the right LED is off, which
indicates that a 2-Gbit HBA port is logged in to the switch port.
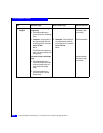
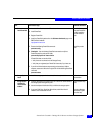
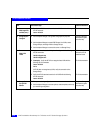
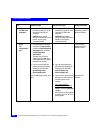
13 Switches
Zone
For a SAN
❑
Zone the switches to provide a path from each additional HBA port (host
initiator) to the SPs.
Switch management
documentation
❑
If SAN Copy, MIrrorView, or MirrorView/A is installed, create any required
zones.
❑
Checkpoint - Use switch management software to verify the switch
connections to the storage system.
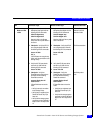
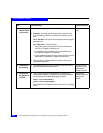
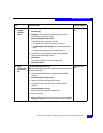
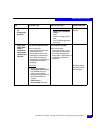
14 Server
Make target SPs
available
❑
Make sure that each HBA sees only the targets (SPs) to which it is zoned
with the following HP-UX commands:
ioscan -fnC disk
insf -e
HP-UX documentation
❑
Verify that HP-UX sees device entries for all LUNS with the following
HP-UX command:
ioscan -fnC disk
❑
Log in as root and restart the Navisphere Host Agent with the following
HP-UX commands:
/sbin/init.d/agent stop
/sbin/init.d/agent start
CX-Series Server
Software for HP-UX
Installation Guide
❑
Make sure again that each HBA sees only the targets (SPs) to which it is
zoned with the following HP-UX commands:
ioscan -fnC disk
insf -e
HP-UX documentation
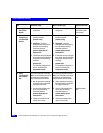
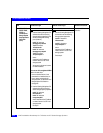
Task
With Access Logix Reference Document