


2-38 Chapter 2
Library Installation
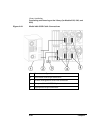
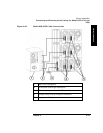
Connecting and Powering on the Library (for Model 12/140)
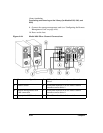
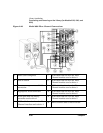
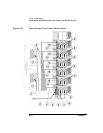
5. For the upper levels of the library:
a. Daisy-chain the drive modules on each level by connecting a
jumper cable from the left drive module to the right drive module.
b. Connect a SCSI cable from the left drive module to the host.
6. Add the appropriate terminators to the remaining SCSI connectors.
7. Connect the remote management card (see “Configuring the Remote
Management Card” on page 4-10).
WARNING
Note the high leakage label on the back of the library before
connecting power to the library.
NOTE The AC power cord is the library’s main AC disconnect device and must
be easily accessible at all times.
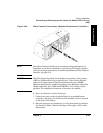
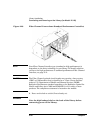
8. Connect the power cord from the power distribution unit to a
dedicated, grounded power receptacle, and power on the library. The
power (standby) switch is recessed and on the lowest level on the
front of the library. After the power-up test is complete (this may take
several minutes), you will see the Home screen on the library’s front
panel. The Home screen displays the status of the drives and library.
9. Power on other peripherals and then the host.