


Chapter 2 2-11
Library Installation
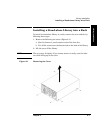
Installing the Library into a Rack (for Model 2/20, 4/40, and 6/60)
Library Installation
Library Installation
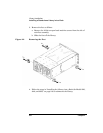
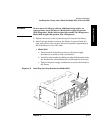
Rackmounting the Library
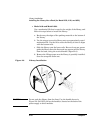
WARNING Before you begin, lower the rack’s leveler feet, and extend the
rack’s anti-tip rails. Failure to extend the anti-tip rails could
result in personal injury or damage to the tape library if the rack
tips over.
TIP To access the display panel and tape doors, mount the top of the library
in the middle of the rack or 48 inches (120 cm) above the floor.
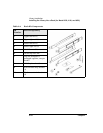
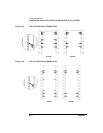
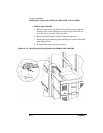
1. Use the template for your model library as a guide, and install five
clip nuts into each front column of the rack (Figure 2-3, Figure 2-4, or
Figure 2-5, depending on the model library). In Figure 2-4 and
Figure 2-5, the grey clip nuts on Models 4/40 and 6/60 indicate the
position of the trim brackets (see step 6). The upper grey clip nuts are
used for racks with a 55-mm bezel depth. The lower grey clip nuts are
used for flush-mount racks.
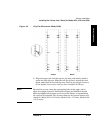
Use the template as a guide, and install four clip nuts into each back
column of the rack.
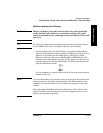
NOTE Use the EIA markers as a reference point to ensure that the holes on the
rack correspond to the holes on the template. The EIA markers on the
template are represented by #>. The # indicates a number on the rack
column.
The rack might look different from the illustration. If the holes in the
rack do not align with the template, move the template up one or two
holes to create proper alignment.