


Chapter 6 6-55
Removing and Replacing Parts
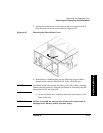
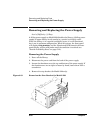
Removing and Replacing the Motherboard
Errors and Troubleshooting
Removing/Replacing Parts
Replacing the Motherboard
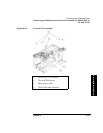
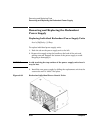
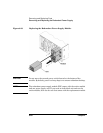
1. Insert the new motherboard into the side of the library. Align it by
using the guide pins near the drive bays (Figure 6-25 on page 6-49).
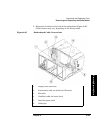
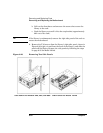
2. Replace the ten screws that secure the motherboard to the library
chassis (Figure 6-26 on page 6-50).
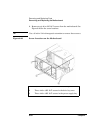
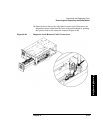
3. Connect all cables to the motherboard (Figure 6-25 on page 6-49 and
Figure 6-29 on page 6-53).
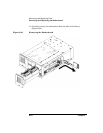
4. Replace the library’s side panels, and tighten the screws (Figure 6-28
on page 6-52).
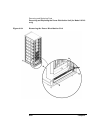
5. Push the library fully into the rack (if needed), and secure it to the
rack.
6. Rotate the sheet-metal cover back into place, and tighten the
thumbscrew.
7. Replace the library cards, drives, vacant slot covers, and power
supply.
8. Replace all external cables and cords.
9. Connect the power cord(s) into a grounded power outlet and power on
the library.