


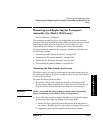

Chapter 6 6-35
Removing and Replacing Parts
Removing and Replacing the Transport Assembly (for Model 12/140
only)
Errors and Troubleshooting
Removing/Replacing Parts
Removing and Replacing the Transport
Assembly (for Model 12/140 only)
Level of Difficulty: [5] Difficult
The transport assembly involves two replaceable parts: the transport
assembly and the vertical lift assembly. Either assembly may be replaced
separately, but both must be removed to service either part. See
page 6-46 for instructions on replacing the vertical lift assembly.
The instructions for replacing the transport assembly are divided into
the following sections:
•“Accessing the Side Panels for Service” on page 6-35
•“Accessing the Transport Assembly” on page 6-38
•“Replacing the Transport Assembly” on page 6-43
•“Re-installing the Bottom Module” on page 6-44
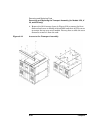
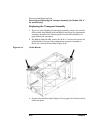
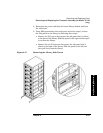
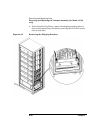
Accessing the Side Panels for Service
The library can be serviced by removing the side and bottom panels on
the cabinet and library. You will not need to access the top of the library
to service this product.
To access the library from the sides:
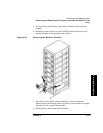
1. Extend the anti-tip rails, which are located at the bottom of the
library cabinet. After extending these rails, lower the leveler feet to
keep the library cabinet from moving when you are servicing it.
WARNING Failure to extend the anti-tip device could result in personal
injury or damage to the library if the rack tips over.
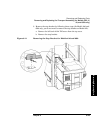
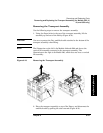
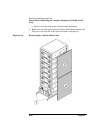
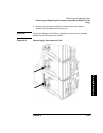
2. Use a 3/16 Allen wrench to remove the side panels from the cabinet
by following these steps (see Figure 6-16 on page 6-36):
a. Loosen the four captive fasteners that secure each side panel to
the cabinet. Hold the panel in place when removing the last screw.
b. Support the panel to lift it slightly up then lower it down.