


83
Recording and Playing MIDI Data
Applications
Selecting the Recording Connector
When you’re recording MIDI data, choose “MIDI-IN” as the
recording connector.
Procedure for Selecting the Recording
Connector
1.
Put the unit into recording standby.
2.
Turn the SELECT dial to choose the REC-In, then press
the dial.
3.
Turn the SELECT dial to choose the MIDI-IN, then press
the ENTER button.
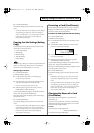
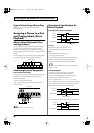
The screen like the one below appears.
4.
ig.13-g02e
* Please be aware that if you press the SELECT dial instead of
the ENTER button, the setting is not confirmed.
• Next, if you’re setting the MIDI time base, go to step 2 of
the procedure for setting the MIDI time base.
Setting the MIDI Time Base
The MIDI time base determines the precision with which you
can record notes, and differs from one equipment to another.
(On some equipment, this is called “resolution.”)
Set the time base for the AR-3000R to either 192 or 240, to
match the time base of the connected MIDI device.
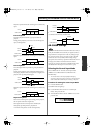
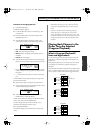
When the time base of the connected MIDI device is:
24, 48, 96, 192, or 384
→
Set the AR-3000R time base to 192
30, 60, 120, 240, or 480
→
Set the AR-3000R time base to 240
Procedure for Setting the MIDI Time Base
1.
Put the unit into recording standby.
2.
Turn the SELECT dial to select “Time Base,” then press
the dial.
* You can set the Time Base only when “MIDI-IN” has been
selected as the recording connector.
3.
Turn the SELECT dial to choose the Time Base (192 or
240), then press the ENTER button.
* Please be aware that if you press the SELECT dial instead of
the ENTER button, the setting is not confirmed.
Starting and Ending Recording
1.
Pressing the PLAY or PAUSE button while in recording
standby starts recording.
During recording, the PLAY indicator lights up in red.
2.
Start playback of the MIDI data.
3.
Press the STOP button to end recording.
• Some MIDI sequencers output the setup data for the
MIDI sound module (data describing the tones for each
part, the volume, effects, etc.)
when the song is
selected
, and it may be impossible to record the MIDI
information correctly when recording is started on the
AR-3000R after song selection. Should this occur, first
start recording on the AR-3000R, and after that initiate
song selection and the start of playback on the MIDI
sequencer.
• In MIDI recording on the AR-3000R, the tempo when
recorded is assumed to be 120. (Tempo information is
not stored.)
• You can’t change a phrase number later, so be sure to
choose the phrase number you want to record to, and
then record.
* Recording cannot span two cards inserted in the slots. When
the free space on one card is used up, recording ends
automatically.
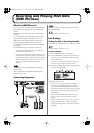
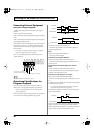
Starting and Stopping Recording Through MIDI Playback
With the AR-3000R, you can start recording when a start
message is received from another MIDI device, and stop
recording when a stop message is received during recording.
During recording standby, recording starts when a System
Realtime start message (FAH) is received, and stops when a
stop message (FCH) is received.
During playback, start (FAH), stop (FCH), and timing clock
(F8H) messages are sent.
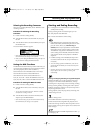
What Is a Timing Clock?
This is MIDI information used when synchronizing a
number of instruments using MIDI. The playback device
sends clock messages at intervals that correspond to its own
tempo, and the receiving device operates in accordance with
those messages.
MIDI Implementation and MIDI Implementation Chart
→
p.
139 through p. 145
AR-3000R_e.book 83 ページ 2010年3月18日 木曜日 午後2時6分