


114
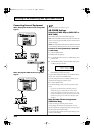
Controlling the AR-3000R Using MIDI Signals (MIDI Control)
Procedure for Setting MIDI Output
1.
Press the MODE button.
The MODE indicator lights up.
2.
Use the SELECT dial to choose “6.1 MIDI Output,” then
press the dial.
3.
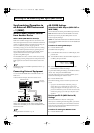
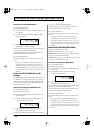
Turn the SELECT dial to set MIDI Output to “THRU,”
then press the dial.
fig.16-g13e
4.
When the prompt appears on the screen, press the
ENTER button to enable the settings.
To quit without making the settings, use the SELECT dial to
choose “NO,” then press the ENTER button.
Once the settings have been successfully modified, you’re
returned to the setting item selection screen.
5.
Press the MODE button.
This ends the setting process and returns you to the usual
screen.
* If you press the MODE button while making settings, a
message asking you to confirm that you want to exit the
setting process appears. Note that if you choose “YES,” then
press the ENTER button, you are returned to the usual screen,
and all setting changes you’ve made up to that point will be
discarded.
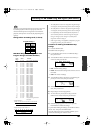
Device-specific ID (MIDI Device ID)
Settings
This sets the MIDI device ID (from 1 through 32). When you
are controlling the unit using MMC and MTC, you need to
set both devices to matching device ID numbers. Check the
device ID of the connected external MIDI instrument, then
set the unit to the same device ID.
Procedure for Setting the MIDI Device ID
1.
Press the MODE button.
The MODE indicator lights up.
2.
Use the SELECT dial to choose “6.6 MIDI Device ID,”
then press the dial.
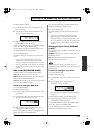
3.
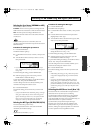
Turn the SELECT dial to choose the MIDI Device ID
(from 1 to 32), then press the dial.
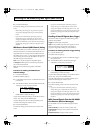
fig.16-g14e
4.
When the prompt appears on the screen, press the
ENTER button to enable the settings.
To quit without making the settings, use the SELECT dial to
choose “NO,” then press the ENTER button.
Once the settings have been successfully modified, you’re
returned to the setting item selection screen.
5.
Press the MODE button.
This ends the setting process and returns you to the usual
screen.
* If you press the MODE button while making settings, a
message asking you to confirm that you want to exit the
setting process appears. Note that if you choose “YES,” then
press the ENTER button, you are returned to the usual screen,
and all setting changes you’ve made up to that point will be
discarded.
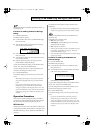
MMC Mode (OFF/MASTER/SLAVE)
This sets the MMC mode to “SLAVE.”
OFF:
MMC information is not sent or received.
MASTER:
MMC information is sent. The unit becomes the
master of the external MIDI instrument.
SLAVE
: MMC information is received. The unit becomes the
slave of the external MIDI instrument.
Procedure for Setting the MMC Mode
1.
Press the MODE button.
The MODE indicator lights up.
2.
Use the SELECT dial to choose “6.7 MMC Mode,” then
press the dial.
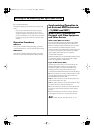
3.
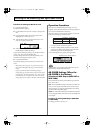
Turn the SELECT dial to set the MMC Mode to
“SLAVE,” then press the dial.
fig.16-g15e
4.
When the prompt appears on the screen, press the
ENTER button to enable the settings.
To quit without making the settings, use the SELECT dial to
choose “NO,” then press the ENTER button.
Once the settings have been successfully modified, you’re
returned to the setting item selection screen.
5.
Press the MODE button.
This ends the setting process and returns you to the usual
screen.
* If you press the MODE button while making settings, a
message asking you to confirm that you want to exit the
setting process appears. Note that if you choose “YES,” then
press the ENTER button, you are returned to the usual screen,
and all setting changes you’ve made up to that point will be
discarded.
AR-3000R_e.book 114ページ 2010年3月18日 木曜日 午後2時6分