


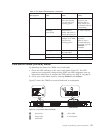
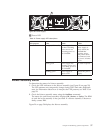

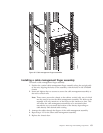
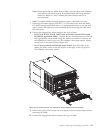
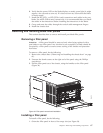
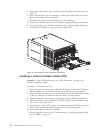

Installing a cable management finger assembly
To install a cable management finger assembly:
1. Position the vertical cable management finger assembly along the upright rails
of the rack, aligning the holes on the assembly with the holes in the SAN384B
chassis.
2. Insert and tighten the two screws to secure the cable management assembly to
the rack's vertical rails.
Note: Three screws secure the chassis to the cabinet vertical rails, two of which
are also used to secure the cable management assembly. The holes on the
assembly will only match two of the holes on the chassis at a time. This
will allow the cable management assemblies to be mounted either
towards the top or towards the bottom of the chassis, depending on
cable density and desired cable routing.
3. Arrange the cables through the fingers of the cable management assembly.
4. Repeat steps 1-3 for the other cable management assembly.
5. Replace the chassis door.
384b016
Figure 32. Cable management finger assemblies
Chapter 5. Removing and installing components 63
|