


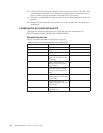

Torque requirements
Use the following torque settings when tightening screws that secure the port-side
exhaust kit and SAN384B to the equipment cabinet.
Table 6. Torque requirements for mounting screws
Screw size Torque
6-32 x .25 in. (.635 cm) Phillips screw 8.75 in.-lbs (10 cm-kg)
10-32 x .63 in.(1.60 cm) Phillips screw 32 in.-lbs (36.86 cm-kg)
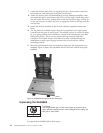
Installing the exhaust kit hardware
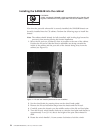
1. Remove the rear door (exhaust side) from the C36 cabinet. Set the door aside,
away from the installation.
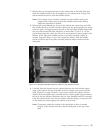
2. The exhaust side of the port side exhaust kit will be installed facing the rear of
the C36 cabinet, and the port side of the SAN384B chassis will also face this
direction.
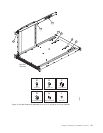
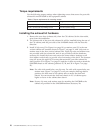
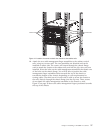
3. Install 10 clip nuts (F in Figure 6 on page 19) or retainer nuts (G) in the rear
vertical cabinet rail locations shown in Figure 7 on page 21, and 4 clip nuts or
retainer nuts in the front vertical cabinet rails. Eight clip nuts and retainer nuts
are provided with the exhaust kit, and six are provided with the hardware
accessory kit. Install the lower two nuts at the same relative locations on all
four cabinet vertical rails, to provide a level mounting of the shelf. The fourteen
nuts will secure the eight 10-32 screws that mount the port side exhaust kit
shelf (position 23 in Figure 7 on page 21) and the six that are used to attach the
SAN384B chassis to the cabinet (positions 25, 28, and 30 in Figure 7 on page
21).
Note: For rails with round holes, use clip nuts. For rails with square holes, use
retainer nuts. Figure 7 on page 21 is only an example showing relative
positions for these nuts in the cabinet rails to mount the shelf and
chassis. You can mount the shelf and chassis in9Uofcabinet space
higher or lower in the cabinet than shown.
Note: Screws, clip nuts, and retainer nuts for attaching the SAN384B to the
cabinet are provided in the SAN384B hardware accessory kit.
20 SAN384B Installation, Service, and User Guide