


80 TASCAM HS-4000
10 – Internal settings
System settings (SYSTEM SETUP)
Make system settings on this screen.
The
SYSTEM SETUP screen has 3 pages: PREFERENCES,
ANALOG Ref. LEVEL ADJUST and CLOCK ADJUST.
Touch the tabs at the bottom of the screen to open the
corresponding page.
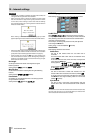
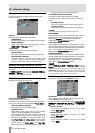
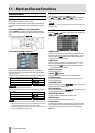
PREFERENCES page
Set system preferences on this page.
KBD Type
Set the connected keyboard type to either US for
English-language keyboards or
JPN for Japanese keyboards.
Setting buttons:
US, JPN (default)
ONLINE Function
Set whether or not to enable the online function (default:
Switchable).
Set to “Switchable” to allow online playback mode to be enabled
from the parallel connector, serial connector (RS-232C) or a
TASCAM RC-HS32PD remote controller (sold separately).
Set to
AlwaysON to not allow online playback to be used and
always output the sound from all connectors. For details, see
“Online functions” on page 89.
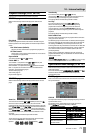
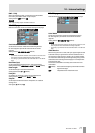
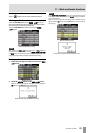
Digital Ref. Level
Set the reference level for digital inputs and outputs to a number
of decibels below the maximum level (full scale).
Setting buttons:
–9dB, –14dB, –16dB, –18dB, –20dB (default)
Analog Input Ref. Lvl
Set the reference level for analog inputs.
The options differ according to the
Digital Ref. Level
etting. s
Digital Ref. Level setting Analog Input Ref. Lvl
9dB
Fixed at +6dB
Not 9dB
+4dB or –20dB
Analog Output Ref. Lvl
Set the reference level for analog outputs.
The options differ according to the
Digital Ref. Level
etting. s
Digital Ref. Level setting Analog Output Ref. Lvl
9dB
Fixed at +6dB
Not 9dB
+4dB or –20dB
NOTE
Sound input through the analog audio inputs according to the analog input
reference level becomes sound in the digital domain according to the digital
reference level.
The analog audio outputs output digital sound according to the digital
reference level as analog sound according to the analog output reference
evel. l
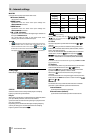
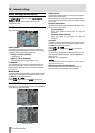
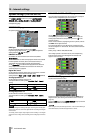
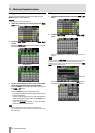
ANALOG Ref. LEVEL ADJUST page
You can make fine adjustments to the analog input and output
reference levels independently for each channel.
Use an
INX knob to adjust the analog input level of the
corresponding channel, and use an
OUTX knob to adjust the
analog output level of the corresponding channel. (“
X” is the
channel number.)
Touch a knob to select it, highlighting its area in yellow, and use
the DATA dial to adjust the level.
Turn the dial to adjust it in 0.1-dB intervals, and press and turn
the dial to adjust it in 1-dB intervals. The value is shown beneath
each knob.
Setting range: –6dB to +6dB (default: 0dB)
If an analog input for a channel is not set, the corresponding
knob will not be shown and “Analog INX not selected” will
appear in the menu area.
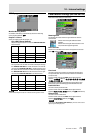
CH4 has no analog input
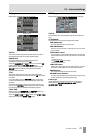
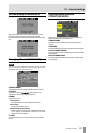
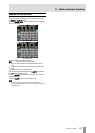
CLOCK ADJUST page
Set the time of the built-in clock.
Touch the item that you want to set, and use the DATA dial to
adjust the item. (See “Setting the time of the built-in clock” on
page 23.)
Touch the
SET button on the CLOCK ADJUST page or press the
DATA dial to confirm the setting.
NOTE
While setting the time, the clock stops and the “:” does not blink. When you
touch the SET button, the clock starts again and the “:” blinks.