46 TASCAM HS-4000
7 – Timeline mode
Importing and exporting AES31
editing information
Importing AES31 editing information
You can import AES31 editing information located in the current
session to the currently loaded session.
When viewed on a computer, the directory of the CF card should
be as follows.
{CF drive name}:\{project name}\{session name}\{AES31 editing
information}
NOTE
You cannot import an AES31 editing information file from a folder other than
that of the current session.
1. Press the PROJECT key on the front panel to open the
PROJECT screen.
2. Touch the e button next to the project that contains
the session with the AES31 editing information that
you want to import to open the session selection
screen. If it is not the current project, a pop-up
window appears confirming that you want to load it.
Touch the
OK button.
3. Touch the e button for the session with the AES31
editing information that you want to import to open the
AES31 selection screen. If it is not the current session,
a pop-up window appears confirming that you want
to load it. Touch the
OK button.
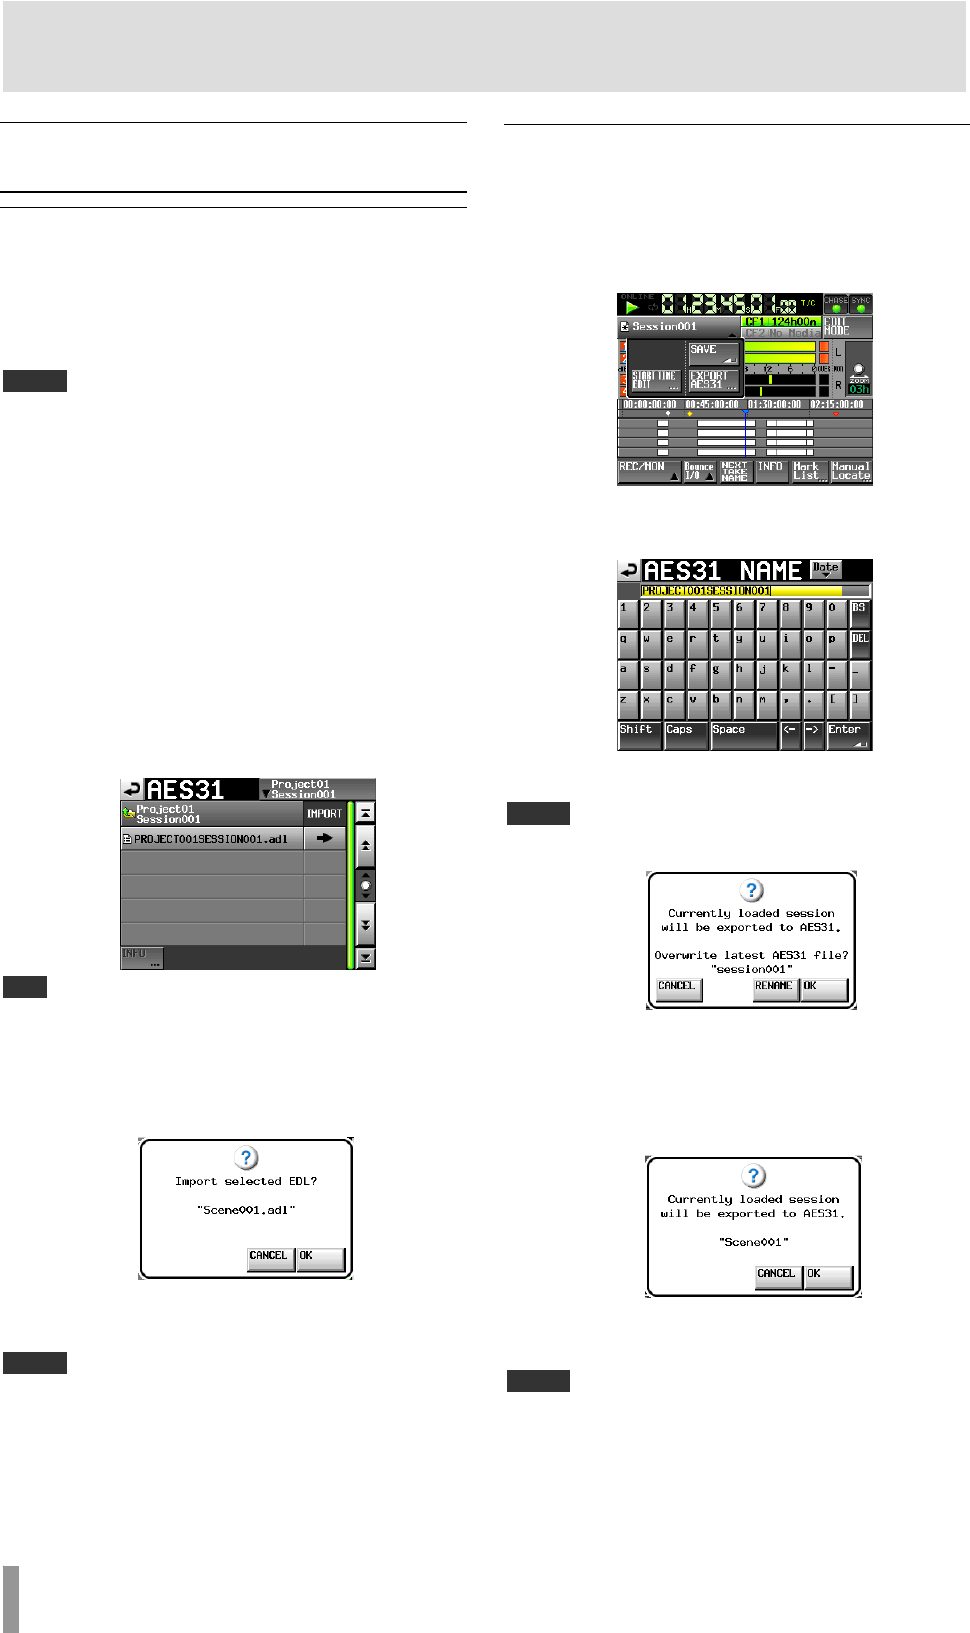
If AES31 editing files are found in the session, they appear in
the list.
TIP
If you press the INFO button after selecting a file by touching the filename
area, the date and time last changed and the file size of that file are shown.
4. Press the e button next to the AES31 editing
information file that you want to import.
5. When a confirmation message pop-up appears, touch
the
OK button or press the DATA dial.
While importing AES31 editing information, a progress
status pop-up appears.
When importing completes, the pop-up disappears.
NOTE
The imported contents replace contents in the current session.
After importing, touch the session name button to open the pull-down menu,
and touch the
Save button to save the session to the CF card.
Exporting AES31 editing information
You can export the currently loaded session to an AES31 file. The
exported file is created in the current session.
1. Press the HOME key on the front panel to open the
Home screen.
2. Touch the session name button on the Home Screen to
open a pull-down menu.
3. Press the EXPORT AES31 button on the pull-up menu
to open the AES31 NAME screen where you can input
the AES31 data file name.
Input the file name. Follow the procedures in “Editing the
project name” on page 35.
NOTE
If the current session has already had an AES31 file imported or exported, a
pop-up window appears confirming that you want to overwrite that file.
Touch the OK button to overwrite that file or press the RENAME button to
open the
AES31 NAME screen.
4. Touch the Enter button on the AES31 NAME screen or
press the DATA dial.
5. When a confirmation message pop-up appears, touch
the
OK button or press the DATA dial.
While the file is being created, a progress status pop-up
appears.
When file creation completes, the pop-up disappears.
NOTE
If a file with the same name already exists, a pop-up window opens to
confirm whether you want to overwrite that file or not. Touch the
OK button
to overwrite that file, or touch the
CANCEL button to return to the AES31
NAME
screen.


