


42 TASCAM HS-4000
7 – Timeline mode
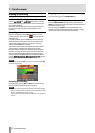
In this chapter, we explain how to use the timeline mode. To use
this unit in timeline mode, set the unit’s operation mode to
TIMELINE MODE. (See “Selecting the operation mode” on the
previous page.)
Please refer to “4 – Basic operation” when reading this chapter.
Preparing to record
Basic preparations
Refer to “4 – Basic operation” and make the basic preparations
for recording.
Creating a new project
Create new projects as necessary. You do not need to create
a new project if you plan to record into an existing one.
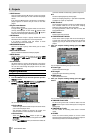
1. Press the PROJECT key on the front panel to open the
PROJECT screen.
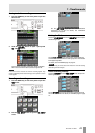
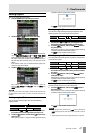
2. Press the CREATE PROJECT button on the PROJECT
screen to open the
CREATE PROJECT screen.
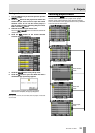
On this screen, set the project name, the name for the first
session, the sampling frequency and the sampling
frequency written to the BWF chunk in recorded audio files.
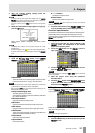
Touch the
NEXT button to open the next page.
Set the frame type then bit length.
Touch the
NEXT button to open the next page.
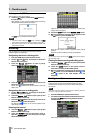
Finally, set the starting time and number of tracks to be
recorded in timeline mode, and then set whether other
settings should be retained from the currently open project
or whether the factory defaults should be used instead.
For further details about these settings, see “Creating new
projects” on page 34.
3. After you complete making settings touch the
CREATE PROJECT button.
NOTE
If a project with the same project name already exists, the CREATE
PROJECT
button appears gray and you will not be able to create a new
project. If this happens, change the project name.
You can also touch the
CREATE PROJECT button on CREATE PROJECT
screens 1/3 and 2/3 to create a project.
4. Touch the OK button when the confirmation pop-up
message appears.
When creation of the project completes, the Home Screen
reopens.
Creating new sessions
Create new sessions as necessary. You do not need to create a
new session if you plan to record into an existing one.
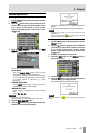
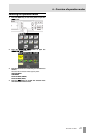
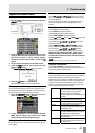
1. Press the PROJECT key on the front panel to open the
PROJECT screen.
2. Touch the e button of the project in which you want
to create a new session to open its session selection
screen.
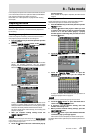
3. Touch the
MAKE SESSION button to open the MAKE
SESSION
screen.
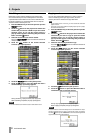
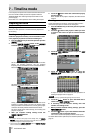
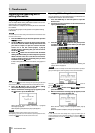
4. Touch the
Session Name button to open the
SESSION NAME screen where you can change the
session name.
To input the session name follow the same procedures in
“Editing the project name” on page 35.
NOTE
You cannot use the “@” symbol at the beginning of a session name.
5. Touch the Enter button or press the DATA dial to
return to the
MAKE SESSION screen.
6. If necessary, set the timeline starting time and
number of recording tracks.
7. When you have finished making settings, press the
MAKE SESSION button.
8. Touch the
OK button or press the DATA dial when the
confirmation pop-up message appears.
After session creation completes, the Home Screen opens.
For details about session operations, see “Session operations” on
page 37.