TASCAM HS-4000 19
2 – Name and functions of parts
ASSIGN FILE button
This shows the ASSIGN screen where you can assign files.
(See “Assign File screen” on page 60.)
ENTRY LIST button
This shows the entry list (ENTRY) screen. (See Entry list
screen on page 60.)
ADJUST ENTRY button
This opens the ADJUST ENTRY *** screen where you
can edit an entry. (See Editing entry titles on page 63,
Edit the playback starting time on page 64, Editing
the playback starting point on page 65 and Editing
the playback end point on page 66.)
SAVE button
This saves the current playlist. This can only be selected
when stopped. (See Saving a playlist on page 67.)
SAVE AS button
This adds a name to the current playlist and saves it. This
can only be selected when stopped. (See Saving a
playlist on page 67.)
EXPORT PPL button
This creates a JPPA PPL file from the current playlist. This
can only be selected when stopped. (See “Creating a JPPA
PPL file from the loaded playlist” on page 68.)
28 Level meters
These are the same as on the Home Screen in timeline
mode.
As on the Home Screen in timeline mode, you can touch this
area to use the solo function.
29 Time display area
The Time display area is divided into 4 equal regions. The
times displayed in each region depend on the time display
mode as shown in the following table.
Left Right
00:00:00:00 Empty Empty Total take or
entry length
Total take or
entry length
Empty Empty 00:00:00:00
00:00:00:00 Empty Empty Total session or
playlist length
Total session or
playlist length
Empty Empty 00:00:00:00
Starting time of
session or
playlist
Empty Empty Ending time of
session or
playlist
During recording and recording standby, however, the time
bar and division lines are not shown.
30 Flash Page number and knob
This shows the Flash Page number. Touch this area to
enable selection (yellow background), and turn the DATA
dial to change the page number (turn right to increase and
turn left to decrease).
31 Current time cursor
This cursor shows the playback position and scrolls
horizontally in correspondence with the time counter.
It is not shown during recording (take mode only).
32 Mark name
This is the name of the mark at the current time or the
nearest preceding mark.
When the name of a mark other than any automatic mark is
shown, touch this area to open the MARK NAME editing
screen.
33 REC/MON button
This is the same as on the Home Screen in timeline mode.
34 NEXT TAKE NAME button
This is the same as on the Home Screen in timeline mode.
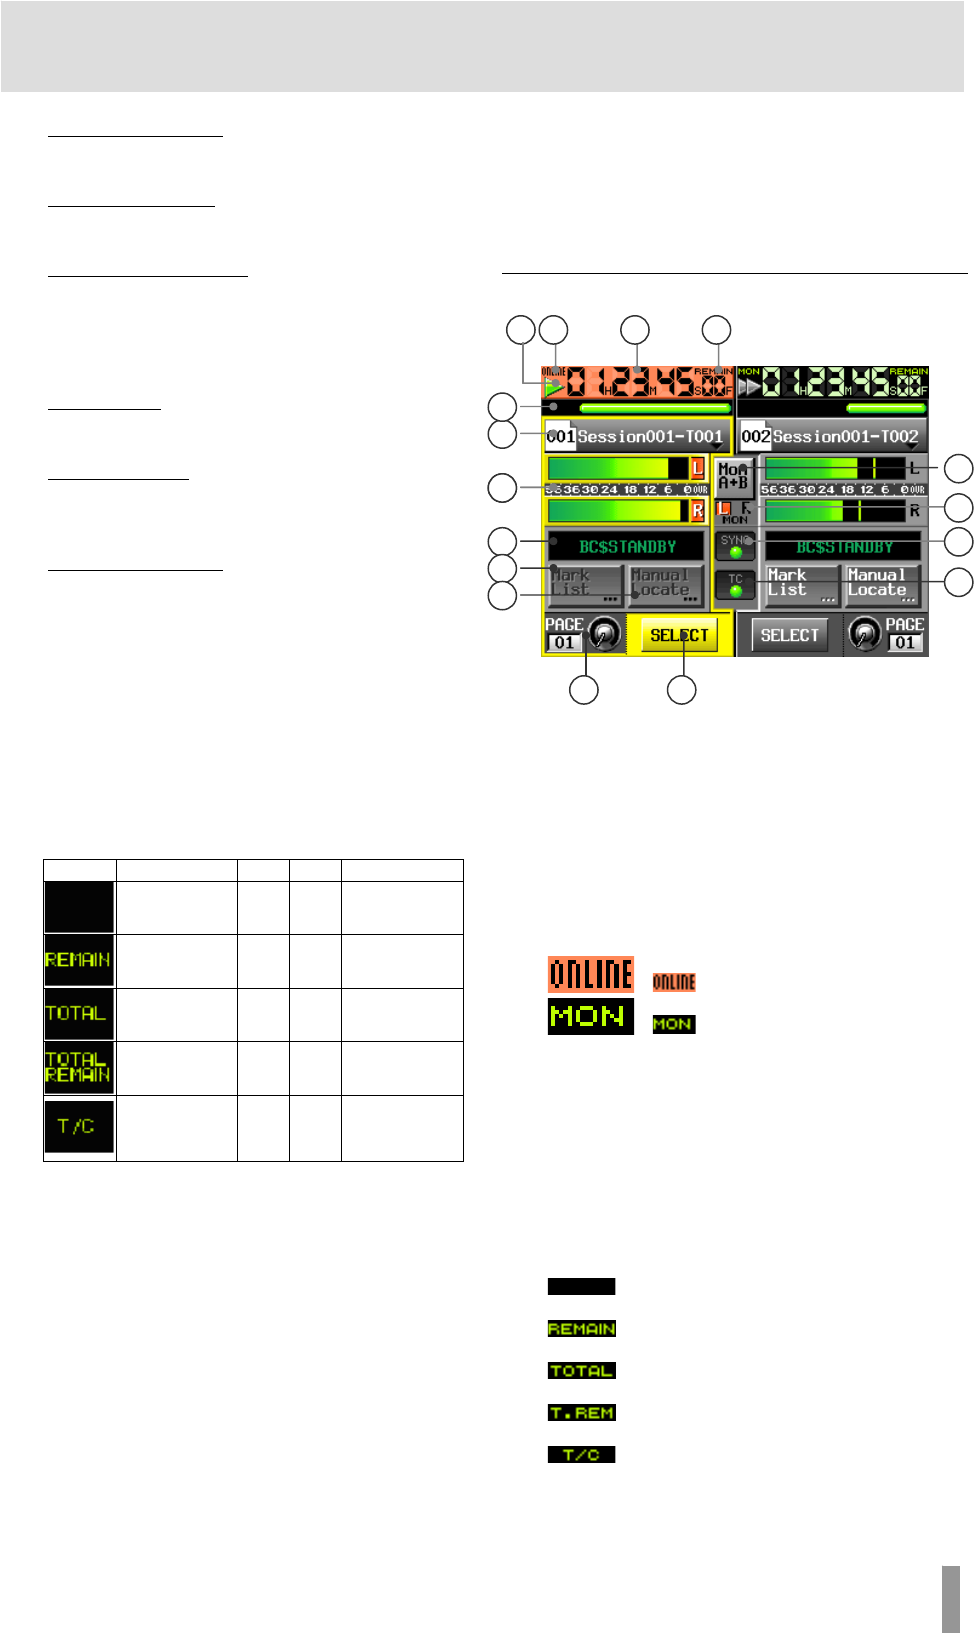
In dual playlist mode
3635 37 38
The left side is Player A, which can be used to play playlist A, and
the right side is Player B, which can be used to play playlist B.
Operation of both Players A and B is the same. Items 45 48 in
the
center are shared by both players.
35 Transport status indicator
This icon shows the current transport status.
Touch this area to open the
PLAY SETUP screen.
The icons have the same meanings as on the Home Screen
in timeline mode.
36 ONLINE status indication
When the online playback mode is ON, the
icon appears.
When online playback mode is OFF, the
icon appears with green letters.
37 Time counter display (button)
The time displayed is the elapsed time or the remaining
time.
When online playback mode is ON, the background appears
red.
Otherwise, this is the same as on the Home Screen in
timeline mode.
38 Time mode indicator (button)
This shows the current time display mode. Touch this area
to change the time display mode.
The time elapsed from the beginning of the
entry is shown.
The time remaining until the end of the entry is
shown.
The time elapsed from the beginning of the
playlist is shown.
The time remaining until the end of the playlist
is shown.
The time code time of the playing entry is
shown.
40
39
45
3
41
42
43
44
49 50
46
47
48


