Chapter C: Sonos Setup Using Controller C-3
system must be registered to activate a trial, so if you have not yet registered,
you can do it now by selecting System Settings>Advanced Settings>System
Registration.)
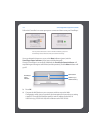
• To select an Internet radio station, select Internet Radio.
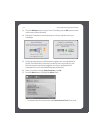
8. If you have music folders you want to access, press the Music button, and then
select System Settings>Music Library Management>Music Library Setup.
9. Select Add New. At this point the Sonos System may detect your shared music
folder(s) automatically. If it is detected, highlight the shared folder, and press OK.
10. If it is not detected, select Enter New.
11. Press Type... to enter the path for this folder. Type \\Name\Sharename, where
Name is the network name for your computer or NAS device, and Sharename is
the name of the top level shared folder (for example, \\linkstation\music_share),
and then press Accept.
12. Press OK.
If the folder is not shared anonymously, you will be prompted to enter a user name and
password. When required:
• Use the scroll wheel to highlight the Username field and press Type.
• Type the name of a user with permission to access this folder, and then press Ac-
cept.
• Use the scroll wheel to highlight the Password field and press Type.
• Type the password associated with this user, and then press Accept.
Setup with a NAS Device (no router)
1. Attach the power cord to a ZonePlayer and plug into a wall outlet.
2. Using your handheld Controller, press OK from the Welcome screen.


