Using Play List: Simplified Voice-Over
97
Using Play List
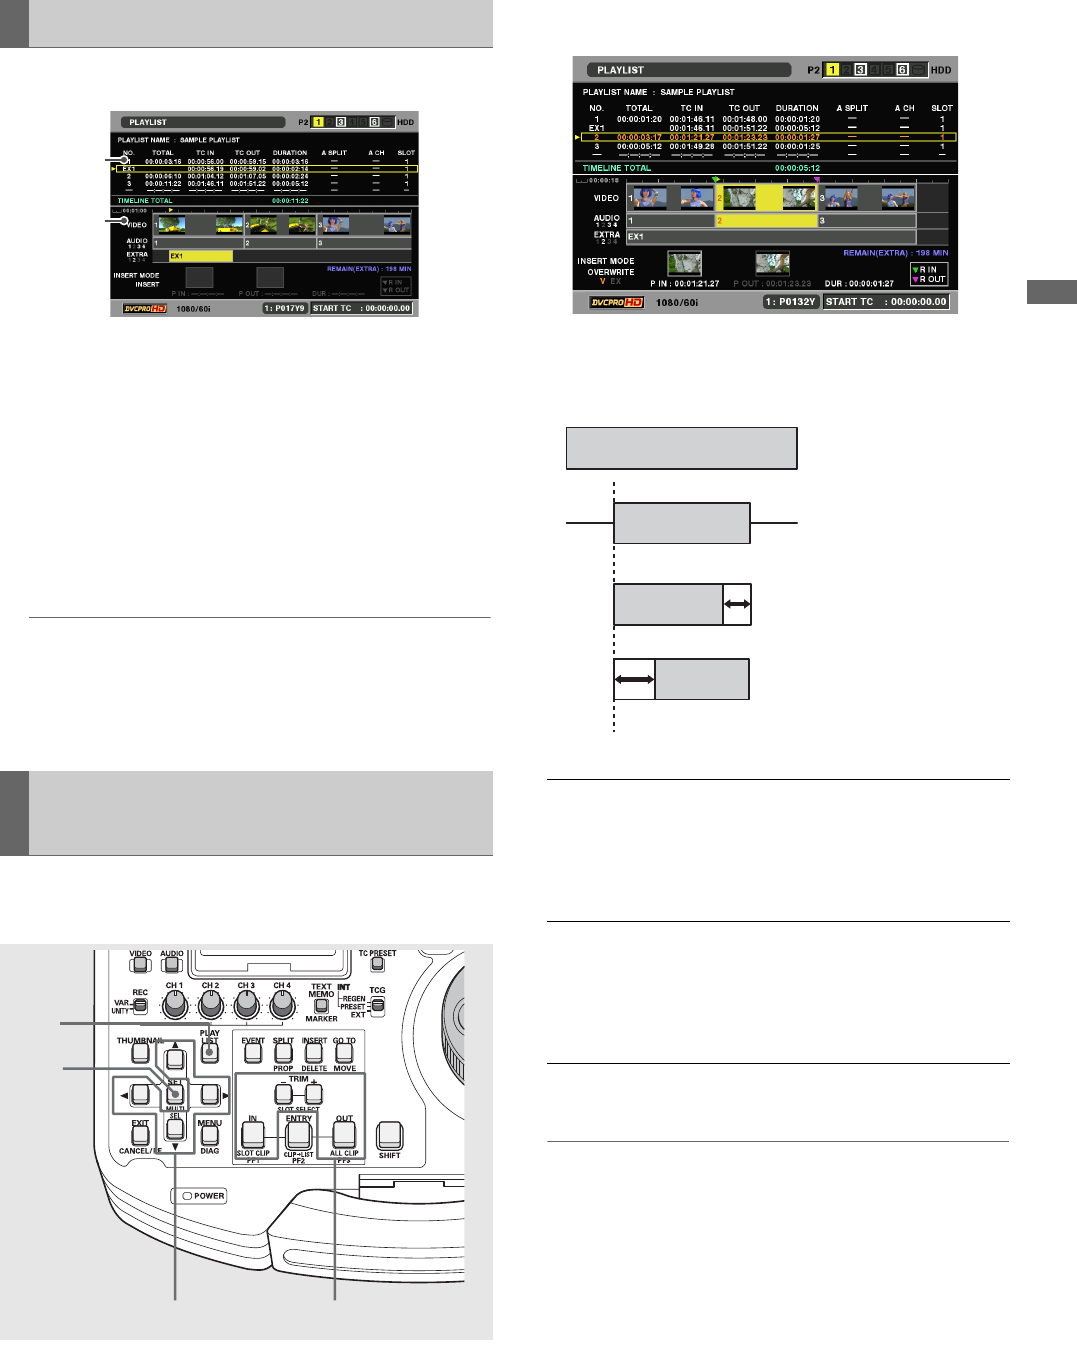
The voice-over appears in the play list screen as shown below.
1) Play List
•The voice-over is added to the line after an event with an
audio start point.
•The “No.” column shows “EX*,” not an event number.
•The “SLOT” column shows P2 card slot numbers storing
audio data (same as P2 card slots storing the play list).
2) Timeline
•Extended tracks are indicated in the “EXTRA” part.
•Recorded channel numbers are also shown.
◆ NOTE:
•Use the TRIM button to zoom in (+) and zoom out (–).
•When a card with a voice-over is not inserted (and NONE is
indicated), play list files cannot be saved and EXTRA audio
event cannot be deleted.
This function allows you to adjust the location of a voice-over
in frame increments (at 24PN in 4-frame increments).
1 Open the play list screen.
2 Select the event you want to change.
3 Use the following procedure to change offset and
duration.
4 Press the ENTRY button to finalize the change.
◆ NOTE:
• Except for the ENTRY button, you can also use the SET button
or move the cursor with the cursor buttons to finalize a change.
Displaying Voice-Over Events
Changing the Trimming of Audio
Recording Location
1)
2)
23
4
1
Change of
start
location:
Hold down the IN button and press the
TRIM+ button or the TRIM– button. The
start location is incremented or
decremented in frame increments (in 4-
frame increments at 24PN).
Change of
end
location:
Hold down the OUT button and press the
TRIM+ button or the TRIM– button. The
OUT point is incremented or decremented
in frame increments (in 4-frame
increments at 24PN).
A normal event
EXTRA
audio track
EXTRA
audio track
EXTRA
audio track
Change of OUT+ TRIM duration
Change of IN + TRIM audio start location
