54
Clip Management: Repairing and Reconnecting Clips
Repairing and Reconnecting Clips
This section describes how to restore bad clips that have
been damaged due sudden power outages during recording
or for other reasons. Such clips are marked by the bad clip
indicator (yellow ). Use the following procedure to repair
bad clips.
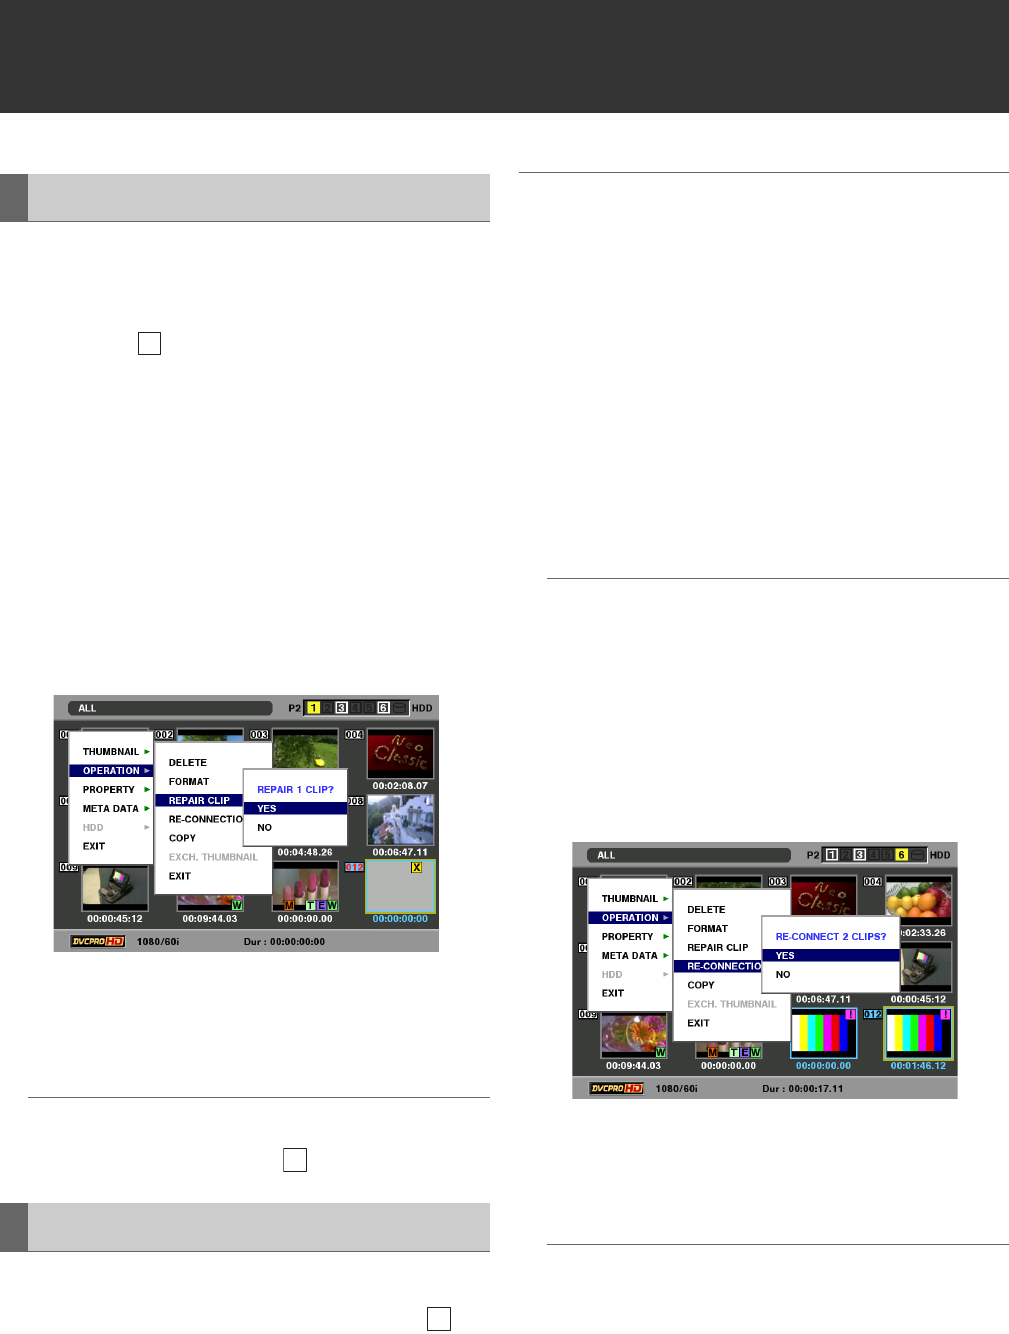
1 Open the thumbnail screen.
2 Select the bad clip to repair.
3 Press the MENU button.
4 Use the cursor buttons to choose [OPERATION] –
[REPAIR CLIP].
5 Select [YES] and press the SET button.
6 Press the MENU button to end processing.
◆ NOTE:
•Some clips are so badly damaged they cannot be repaired.
Such clips are indicated by a red .
A clip spanning multiple P2 cards that cannot be recognized
as a complete clip is marked by the incomplete clip (
indicator). The reconnection function allows you to reconnect
related clips and restore the original clip.
◆ NOTE:
Incomplete clips occur under the following conditions.
• When the individual clip segments on each P2 card that make up the
clip are copied separately.
• When the clip segments on each card that make up a clip recorded
on multiple cards are separately copied to a hard disk drive and
then copied back to a P2 card.
•When a 5-minute or longer DVCPRO HD clip (10-minute or longer
DVCPRO50 and 20-minute or longer DVCPRO/DV clip) is copied to
a hard disk drive and later written back to a P2 card.
1 Open the thumbnail screen.
2 Select the incomplete clips to reconnect.
◆ NOTE:
•Normally, thumbnails with the incomplete clip mark are usually
grouped together.
3 Press the MENU button.
4 Use the cursor buttons to choose [OPERATION] –
[RE-CONNECTION].
5 Select [YES] and press the SET button.
6 Press the MENU button to end processing.
◆ NOTE:
•When some but not all the clip segments in a clip that consists
of three or more clip segments are reconnected, the incomplete
clip mark will remain.
Repairing Bad Clips
Reconnecting Incomplete Clips
X
X
!
