


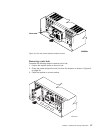
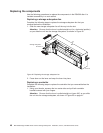


2. Using a flat-blade screwdriver, tighten the two captive screws on the new
module, securing it into place.
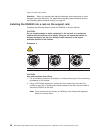
Replacing a mini hub
Complete the following steps to replace a mini hub that you removed before the
installation:
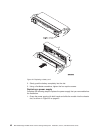
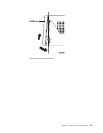
1. Completely slide the mini hub into the appropriate slot, as shown in Figure 27.
OUT
IN
!
2Gb/s
1Gb/s
OUT
IN
!
2Gb/s
1Gb/s
OUT
IN
!
2Gb/s
1Gb/s
OUT
IN
!
2Gb/s
1Gb/s
OUT
IN
!
2Gb/s
1Gb/s
OUT
IN
!
2Gb/s
1Gb/s
OUT
IN
!
2Gb/s
1Gb/s
OUT
IN
!
2Gb/s
1Gb/s
OUT
IN
!
2Gb/s
1Gb/s
GS000039b
2. Using a flat-blade screwdriver, tighten the captive screw.
3. Repeat step 1 and step 2 to replace additional mini hubs.
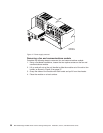
Replacing the front bezel
Complete the following steps to replace the bezel:
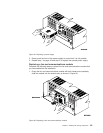
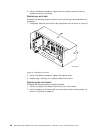
1. Slip the top edge of the bezel under the top lip of the chassis.
2. Push the bottom of the bezel until the pins snap into the mounting holes, as
shown in Figure 28 on page 45.
Figure 27. Replacing a mini hub
44 IBM TotalStorage DS4500 Fibre Channel Storage Subsystem: Installation, User’s, and Maintenance Guide