32
RQT8346
Scheduled recording
See also the notes “Important notes for recording” (l 9).
[HDD] [RAM] [-R] [-RW‹V›] [+R] [+RW]
≥You can enter up to 8 days in advance.
≥The program name becomes the name of the recorded title if the
program is listed on the program listings.
≥There may be some channels that are not displayed in the
program listings even if they are receivable. In this case set them
manually (l 33).
Preparation
≥Turn on the television and select the appropriate video input to suit
the connections to this unit.
≥If recording to DVD, insert a disc that you can use for recording
(l 12).
[HDD] [RAM] [-R] [-RW‹V›] [+R] [+RW]
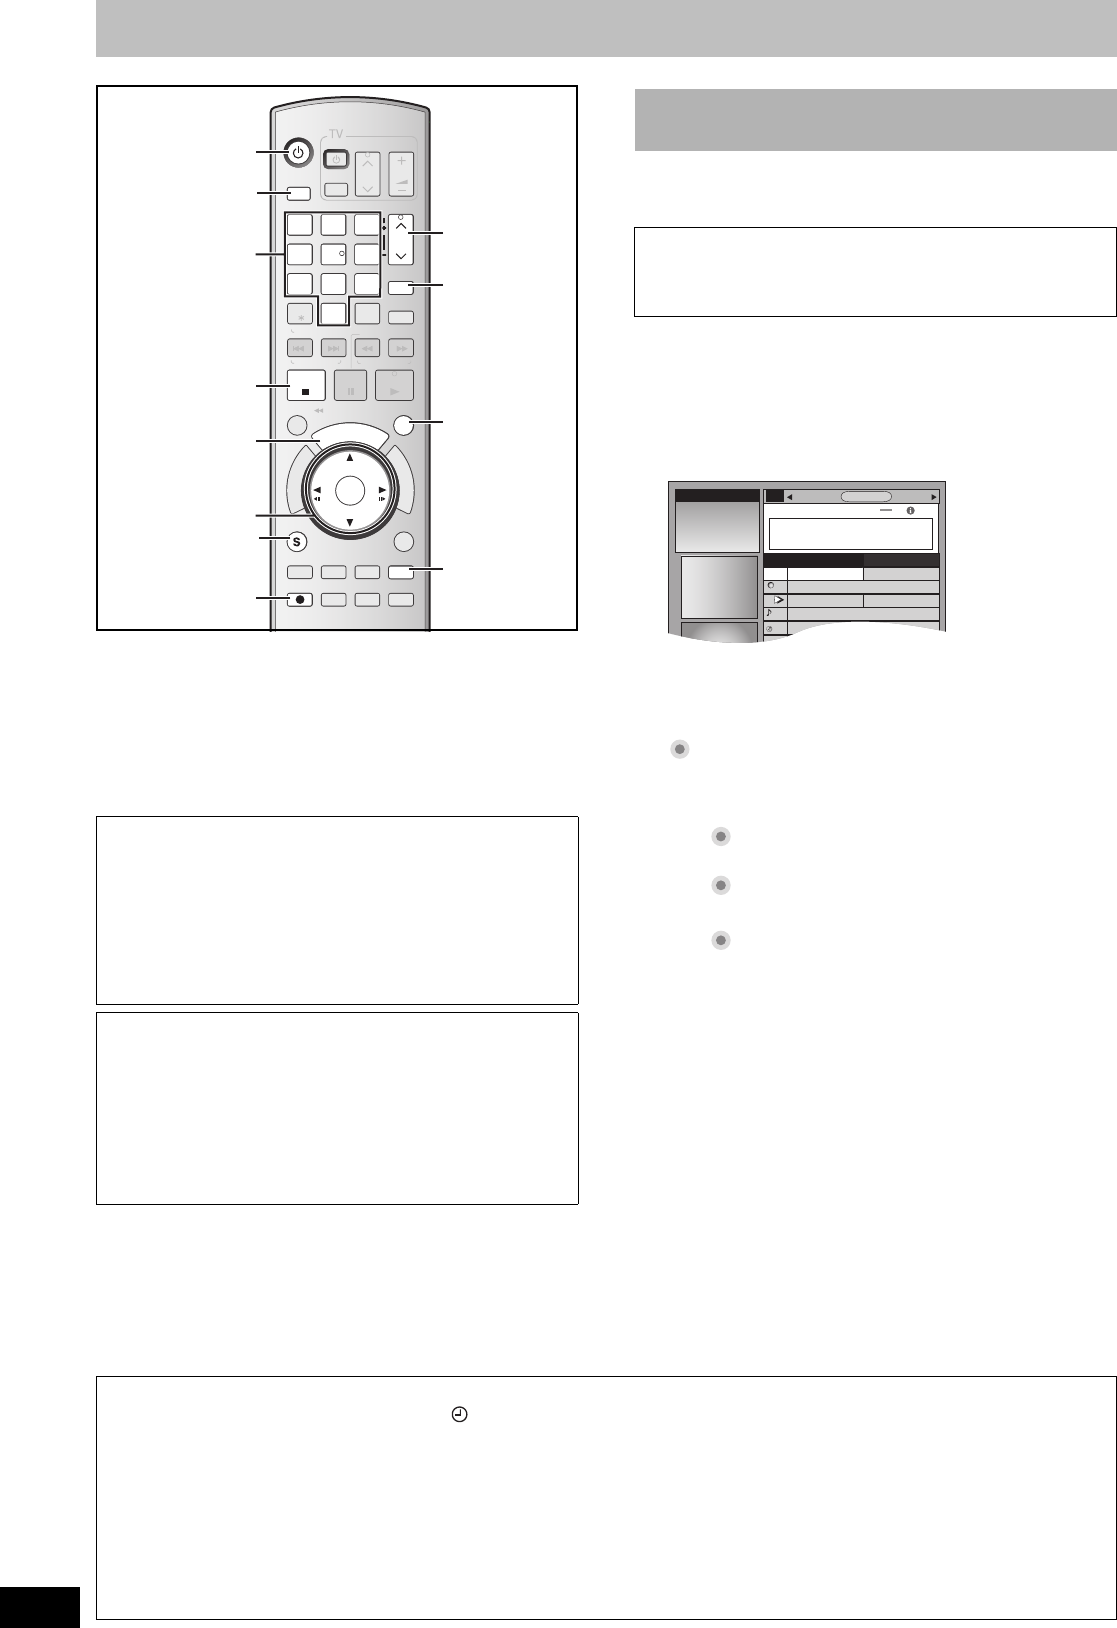
You can perform scheduled recording easily by just marking the
desired program(s) in the program listings.
[1] Press [TV GUIDE].
If the program listings is not completely downloaded, the
“Display setup progress” screen is displayed.
Select “LISTINGS” using [2, 1]. (You can use only the portion
of TV programs that downloaded).
Further instructions on utilizing the TV Guide On Screen
®
system l 35
[2] Press [3, 4, 2, 1] to select the program.
≥To skip one screen
Press [PAGE W] or [PAGE X].
[3] Press [¥, REC].
“ ” appears in the list to indicate that the program is set for
scheduled recording.
≥Press [¥, REC] to change the frequency.
Each time you press the button:
≥As long as the setting is not changed, the program is recorded
to the HDD in the recording mode selected by the unit.
≥To change the setting
Press [SUB MENU] (l 36, To make scheduled recording,
step 2).
Repeat steps 2 to 3 to program other recordings.
[4] Press [TV GUIDE].
Returns to the television screen.
Program listings for satellite services other than DirecTV
cannot be received.
≥Customers using the DISH Network service can set
scheduled recordings on the DISH Network receiver
(l below).
≥If you are using another satellite service, you can use
manual recording to record.
DirecTV/DISH Network service is only available in the United
states.
Using the DISH Network service
Program scheduled recordings using the DISH Network receiver.
At this time, set the unit to the channel that receivers broadcasts
from the DISH Network receiver.
[1] Press [CH, W, X] to select the appropriate channel on this unit.
[2] Press [Í, DVD/VHS POWER] to turn this unit off.
≥Visit Gemstar’s homepage for more information about scheduled
recordings for DISH Network.
URL: http://www.tvgos.com/support/echostar/
DVD/VHS
T
V
G
U
I
D
E
ENTER
F
U
N
C
T
I
O
N
S
VOLUME
CH
CH
TV/VIDEO
POWER
POWER
PAU SESTOP
SLOW/SEARCH
3
2
1
6
4
9
8
7
0
INPUT
SELECT
CM SKIP
REC MODE
RETURN
SUB MENU
SCHEDULE
D
I
R
E
C
T
N
A
V
I
G
A
T
O
R
DISPLAYAUDIO
REC
STATUS
AB
VCR Plus+
DELETE
SKIP/
INDEX
TIME SLIP
/
JET REW
PLAY
RESET
CANCEL
TRACKING/V-LOCK/PAGE
DRIVE
SELECT
TRACKING/V-LOCK/PAGE
5
Info
CREATE
CHAPTER
DVD/VHS
T
V
G
U
I
D
E
POWER
STOP
3
2
1
6
4
9
8
7
0
ENTER
SCHEDULE
SUB MENU
REC
VCR Plus+
CH
TRACKING/V-LOCK/PAGETRACKING/V-LOCK/PAGE
5
3,4
,
2,1
ENTER
Í
TV GUIDE
PAGE W
,
X
CH, W
,
X
∫
SCHEDULE
VCR Plusr
SUB MENU
¥
REW
FF
DRIVE
SELECT
DRIVE SELECT
Info
Info
Numbered
buttons
∫ Using the TV Guide On Screen
®
system to
make scheduled recordings
For successful scheduled recordings
The program listings will not display immediately after purchasing
this unit. Complete the TV Guide On Screen
®
system setup and
download the program listings (l23).
[.
l
l
l
l
l
l
l
{
Records only once.
;
Records regularly.
;
Records weekly.
;
Off
TODODAY
Last
Channel
SEARCHSCHEDULE
INFO
87
NWGB
TV
ducation
LISTINGS
8:30PM
8:00 8:30
8:00PM
R
W
When programming is finished and [TV GUIDE] is pressed
≥The unit goes to scheduled recording standby (“ ” lights on the unit’s display); however, it may not turn off automatically.
To save power, turn
the unit off by pressing
[Í, DVD/VHS POWER]
.
≥Scheduled recordings are activated regardless of whether the unit is turned on/off.
≥When using the cable box or the satellite receiver, make sure the cable box or the satellite receiver is turned on.
∫ Notes on scheduled recording l 34
∫ To check, change or delete a program
l 34
∫ To cancel scheduled recording when it has already begun
[1] Press [DRIVE SELECT] to select the recording drive.
[2] Press [∫, STOP] then press [2, 1] to select “Stop recording” and then press [ENTER].
M6740P.book 32 ページ 2006年1月30日 月曜日 午後3時30分


