


Chapter 2 Standard Operations
2.4 Turning On and Off the AUTO POWER Switch
ETERNUS DX60 S2 Disk storage system User’s Guide -Operation-
40
Copyright 2012 FUJITSU LIMITED P3AM-5512-03ENZ0
Procedure
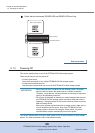
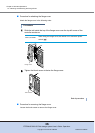
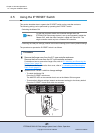
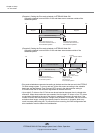
1 Remove the flange cover from the 2.5" type controller enclosure.
Remove the front cover from the 3.5" type controller enclosure.
For details on how to remove the flange cover, refer to "2.2 Attaching and Removing the
Flange Cover" (page 35).
For details on how to remove the front cover, refer to "2.3 Attaching and Removing the
Front Cover" (page 37).
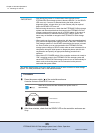
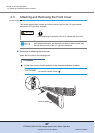
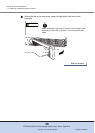
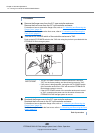
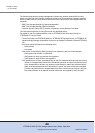
2 Turn the AUTO POWER switch of the controller enclosure to "ON".
Push up the AUTO POWER switch to the "ON" side using the pin that is provided with the
ETERNUS DX Disk storage system.
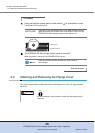
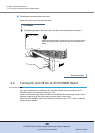
3 Re-attach the flange cover to the 2.5" type controller enclosure.
Re-attach the front cover to the 3.5" type controller enclosure.
For details on how to attach the flange cover, refer to "2.2 Attaching and Removing the
Flange Cover" (page 35).
For details on how to attach the front cover, refer to "2.3 Attaching and Removing the Front
Cover" (page 37).
End of procedure
IMPORTANT
• The AUTO POWER switch of the drive enclosure is turned to
"OFF" as the factory setting, and should not be turned to "ON".
• If AC power is being supplied, turning the AUTO POWER switch
of the controller enclosure to "ON" will cause the ETERNUS DX
Disk storage system to turn on.
• If the AUTO POWER switch of the controller enclosure is turned
to "ON", connecting the power cord to the outlet will cause the
ETERNUS DX Disk storage system to turn on.
AUTO POWER
switch
Pin