Getting started
14
VQT0P03
≥Please read “Precautions”. (l 3)
≥Before connection, turn off all equipment and read the appropriate operating instructions.
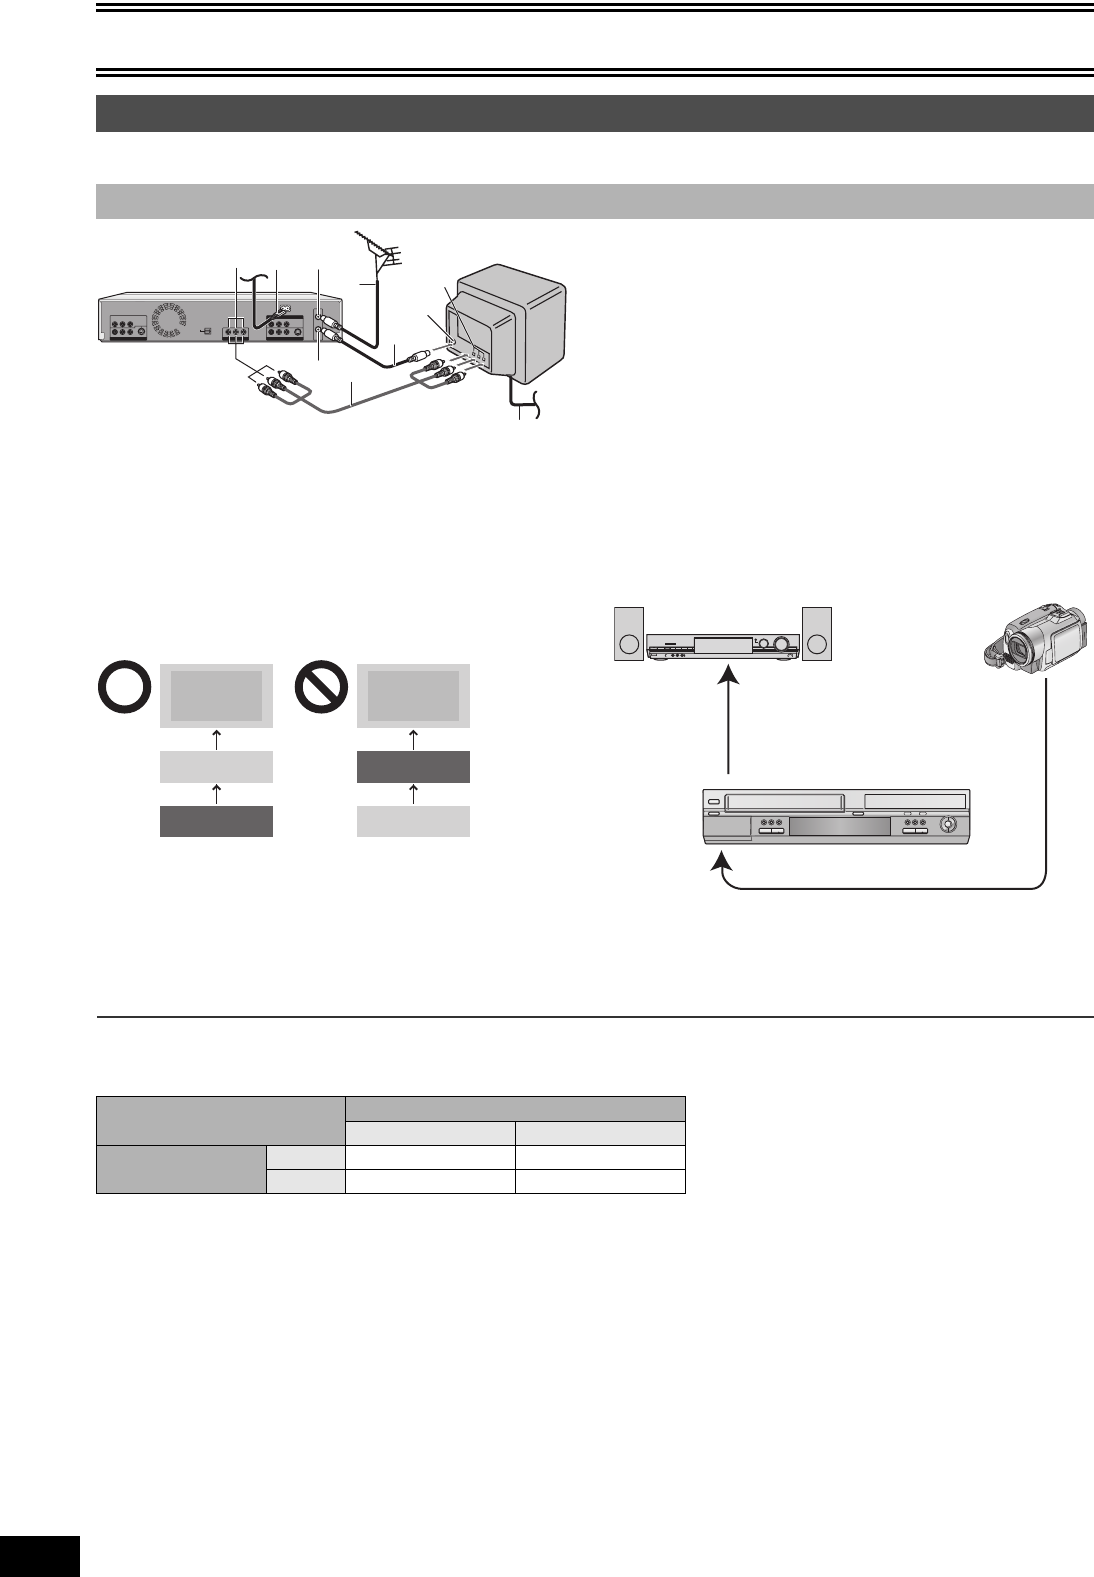
∫Connect as following steps
1 RF Coaxial cable (supplied)
2 Audio/Video cable (supplied)
3 Aerial lead (not supplied)
4 AC mains leads (supplied)
5 AC mains leads (not supplied)
Sockets
(1) Audio/Video Output sockets (DVD/VHS COMMON OUT)
(2) Aerial Input socket
(3) Aerial Output socket
(4) Aerial Input socket
(5) Audio/Video Input sockets
∫Do not connect the unit through a video cassette
recorder
Video signals sent through video cassette recorders will be affected
by copyright protection systems and the picture will not be shown
correctly on the TV.
≥When connecting the unit to a TV with a built-in VCR, connect to
the input terminals on the TV, not the VCR.
∫Connection examples with other equipment
For your reference
≥The equipment connections described are examples.
≥Peripheral equipment and optional cables are sold separately
unless otherwise indicated
.
∫When the unit is not to be used for a long time
To save power, unplug it from the household mains socket. The unit consumes a small amount of power even when it is turned off.
Standby power consumption
≥When “Power Save” is set to “On”, the “Quick Start” function does not work.
∫Quick Start (l 43)
1 Sec. Quick Start for Recording on DVD-RAM°
° From the power off state, recording on DVD-RAM starts about 1 second after first pressing the [Í, DVD/VHS] and then sequentially
pressing the [¥, REC] (Quick Start Mode).
STEP 1 Connection
∫ Connecting a TV
(1)
(2)
(3)
(4)
(5)
3
4
5
2
1
TV TV
The unit
VCR
VCR
The unit
Amplifier (l 15) Video camera (l 65)
The unit
From the AUDIO/VIDEO OUT terminal
or the DIGITAL AUDIO OUT terminal
To AV3 input terminals (front)
Power Save (l 43)
On Off
Quick Start (l 43)
On — Approx. 15 W
Off Approx. 4 W Approx. 7 W
M7620(GN).book 14 ページ 2005年5月25日 水曜日 午後12時2分


