21
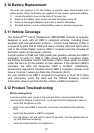
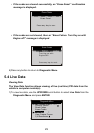
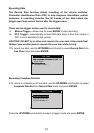
3.10 Battery Replacement
The scan tool requires a 9V cell battery to operate when disconnected from
vehicle power. When the battery icon appears on the screen, replace the battery.
1) Locate the battery cover on the back of the scan tool.
2) Remove the battery cover screw and slide the battery cover off.
3) Remove discharged batteries and install a new 9V cell battery.
4) Reinstall battery cover by sliding battery cover on and securing screw.
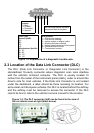
3.11 Vehicle Coverage
The AutoLink
Pro®
AL510 Professional OBDII/EOBD Scanner is specially
designed to work with all OBD II compliant vehicles, including those
equipped with next-generation protocol -- Control Area Network (CAN). It
is required by EPA that all 1996 and newer vehicles (cars and light trucks)
sold in the United States must be OBD II compliant and this includes all
Domestic, Asian and European vehicles.
A small number of 1994 and 1995 model year gasoline vehicles are OBD II
compliant. To verify if a 1994 or 1995 vehicle is OBD II compliant, check
the Vehicle Emissions Control Information (VECI) Label which is located
under the hood or by the radiator of most vehicles. If the vehicle is OBD II
compliant, the label will designate “OBD II Certified”. Additionally,
Government regulations mandate that all OBD II compliant vehicles must
have a “common” sixteen-pin Data Link Connector (DLC).
For your vehicle to be OBD II compliant it must have a 16-pin DLC (Data
Link Connector) under the dash and the Vehicle Emission Control
Information Label must state that the vehicle is OBD II compliant.
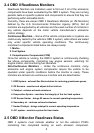
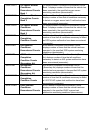
3.12 Product Troubleshooting
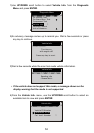
Vehicle Linking Error
A communication error occurs if the scan tool fails to communicate with the
vehicle’s ECU (Engine Control Unit). You’ll need to do the following to check it:
• Verify that the ignition is ON;
• Verify scan tool’s OBD II connector is securely connected to the vehicle’s
DLC;
• Verify that the vehicle is OBD II compliant;
• Turn the ignition ‘off’ and wait for about 10 seconds. Turn the ignition back to
‘on’ and continue the testing.
• Verify the control module is not defective.