9
Getting Started
Replacing the batteries
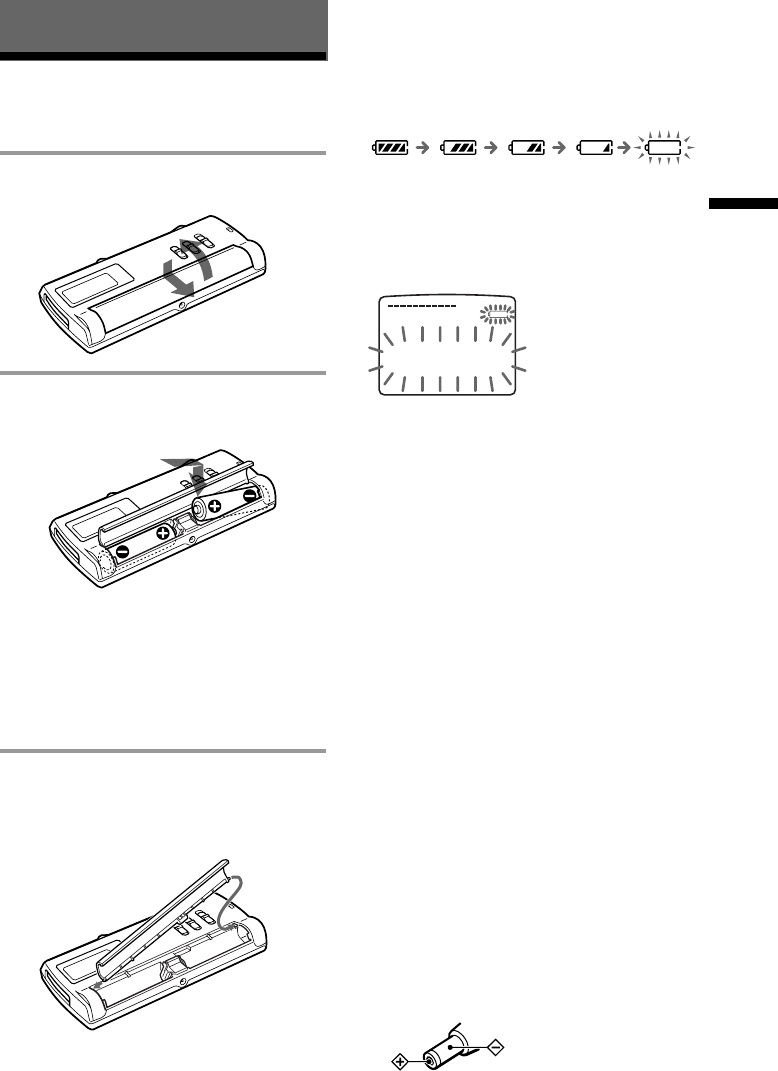
The battery indicator in the display window
shows the battery condition as follows:
When "LOW BATTERY" is displayed, replace
the batteries with new ones.
Notes
•Do not use manganese batteries for this unit.
•When you replace the batteries, insert the new
ones within 3 minutes after you removed the
exhausted ones. Otherwise, the display may show
the clock setting display or incorrect date and time
when you reinsert the batteries. In this case, set the
date and time again.
The recorded messages, however, will remain.
•When replacing the batteries, be sure to replace
both batteries with new ones.
•Do not charge dry batteries.
•When you are not going to use the unit for a long
time, remove the batteries to prevent damage from
battery leakage and corrosion.
Battery life*
With continuous use, approx. 5 hours
recording/ 4 hours playback
* Using Sony alkaline batteries LR03 (SG)
* When playing back through the internal speaker
with VOL control at around 4
The battery life may shorten depending on
the operation of the unit.
Using on house current
Connect the AC power adaptor AC-E30HG
(not supplied) to the DC IN 3V jack of the
unit and to the wall outlet.
Do not use any other AC power adaptor.
Getting Started
Step 1: Installing
the Battery
1 Slide and lift the battery
compartment lid.
2 Insert two size AAA (LR03) alkaline
batteries with correct polarity, and
close the lid.
Clock setting display appears when you
insert batteries for the first time, or when
you insert batteries after the unit has
been without batteries for a certain
period of time. Please refer to Steps 4 to 5
in “Step 2: Setting the Clock” on page 10
to set the date and time.
Note
If the battery compartment lid is accidentally
detached, attach it as illustrated.
New
batteries
Weak
batteries
Batteries are
exhausted.
The unit will
stop operation.
OW BATTERY
L
Polarity of the plug


