13
GB
Getting Started
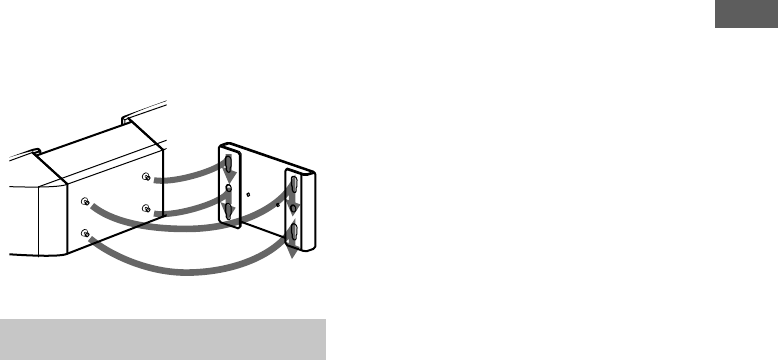
5 Attach the system to the wall hanging
bracket which you have fixed to the wall.
Make sure to grasp the main unit, and not the
speakers.
After attaching the system to the bracket,
push down on the system to make sure they
are securely fastened to the bracket.
Setting the clock
1 Turn on the system.
2 Press CLOCK/TIMER SET on the
remote.
3 Press MENU + or – on the remote
repeatedly to set the day, and then
press ENTER/YES or CURSORt on
the remote.
The hour indication flashes.
4 Press MENU + or – on the remote
repeatedly to set the hour, and then
press ENTER/YES or CURSORt on
the remote.
The minute indication flashes.
5 Press MENU + or – on the remote
repeatedly to set the minute, and then
press ENTER/YES on the remote.
If you make a mistake
Press TCURSOR or CURSORt on the
remote repeatedly until the indication you want
to change (day, hour, minute) flashes, and then
change the setting.
To adjust the clock
1 Press CLOCK/TIMER SET on the remote.
2 Press MENU + or – on the remote repeatedly
until “CLOCK SET?” appears in the display,
and then press ENTER/YES on the remote.
3 Do the same procedures as steps 3 to 5
above.


