54
Timer Recording
You can enter up to 16 programmes up to a month in advance.
Entering G
-CODE number is an easy way of timer recording. You can
find these codes in the newspapers and magazines.
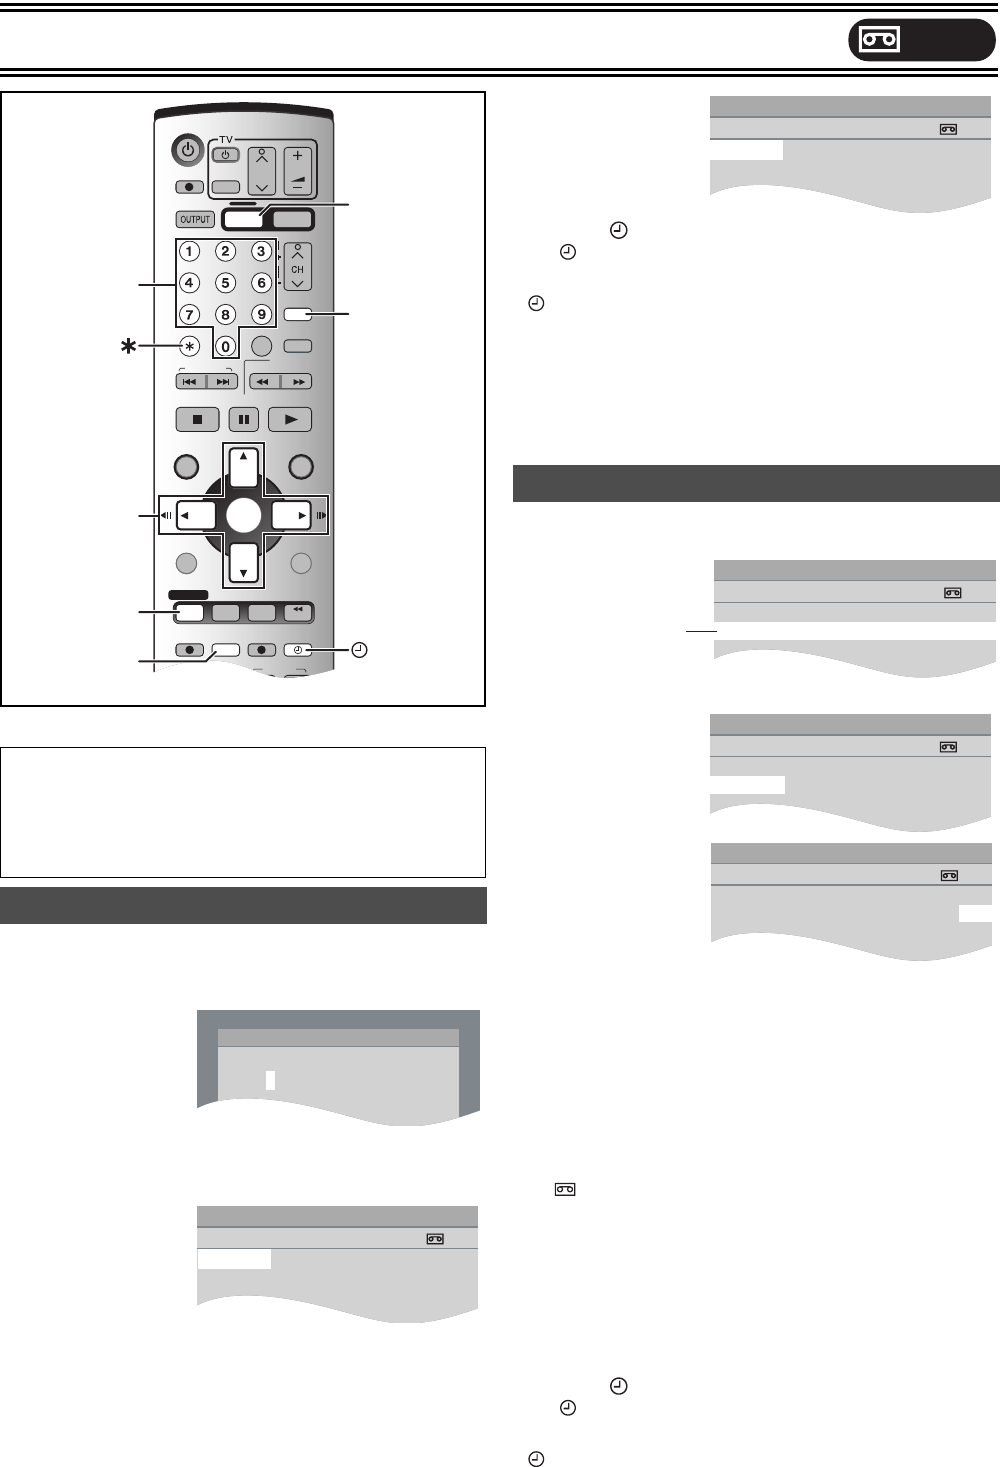
[1] Press [G-Code].
[2] Press the numeric buttons to enter the G
-CODE
number.
≥Press [2] to move back to correct digit.
[3] Press [ENTER].
Confirm the
programme and
correct it if necessary
using [3, 4, 2, 1].
(l right step 3.)
If “– –” appears
under “Name”, press [3, 4] to select a desired programme
position.
≥You can also press [REC MODE] to change the recording
mode.
≥After you have entered the information of a TV station, it is kept
in the unit’s memory.
[4] If the programme is
correct
Press [ENTER].
≥To continue
programming, repeat
steps 1–4.
[5] Press [ , TIMER].
≥“ ” lights on the unit’s display.
The timer recording standby mode is activated on VHS
(“ ” lights on the VHS unit’s display). However, the unit may
not be turned off automatically.
[6] Turn the unit off when you do not play or record
on DVD.
≥If the timer recording is started with keeping the unit turned on,
the unit is not turned off automatically even after the timer
recording is completed.
[1] Press [PROG/CHECK].
≥Or select the “Timer recording” in the VHS FUNCTIONS. (l 56)
[2] Press [ENTER].
[3] Press [1] to
move and
change the
items with
[3, 4].
≥You may use the numeric buttons to enter “Name”, “Date”,
“Start”, “Stop”.
≥You can also press [REC MODE] to change the recording
mode.
≥Name (Programme Position/TV Station Name)
≥Date
You can also make a daily or weekly programme.
≥Start (start time)/Stop (finish time)
The time increases or decreases in 30-minute increments if
you hold the button.
≥ (Tape speed) (l 53)
SP,.LP,.EP,.A°,.SP...
° Tape Speed Auto Change Function (l 55)
≥VPS/PDC (This function is not available in Australia.)
ON,.OFF (
jjj) (l 55).
[4] Press [ENTER] when you have finished making
changes.
≥To continue programming:
Repeat steps 2, 3, and 4.
[5] Press [ , TIMER].
≥“ ” lights on the unit’s display.
The timer recording standby mode is activated on VHS
(“ ” lights on the VHS unit’s display). However, the unit may
not be turned off automatically.
Preparation
≥Check that the clock is set to the correct time. If it has not been
set, refer to page 48.
≥Insert a video cassette with an intact erasure prevention tab.
(l 50)
≥Press [VHS].
Using G-CODE
SLOW/
SEARCH
REW
FF
DUBBING
DVD/VHS
CREATE
CHAPTER
SKIP/INDEX
PLAY
STOP
PAU SE
TRACKING/V-LOCK
AUDIOEXT LINK
FUNCTIONSDIRECT NAVIGATOR
TOP MENU
RETURN
SUB MENU
PROG/CHECK
VHS REC
TIME SLIP
STATUS
DVD REC REC MODE
DVD/VHS
CANCEL/RESET INPUT SELECT
DIRECT TV REC
TIMER
VHS
VHS
G-Code
CREATE
CHAPTER
CH
AV
VOLUME
DVD
DVD
JET REW
ENTER
DISPLAY
VHS
PROG/CHECK
3, 4, 2, 1
ENTER
REC MODE
G-Code
Numeric
Buttons
Timer recording
/
- - - - - - - - - / - - - - : - - - - : - - - - - -
- - - - - - - - - / - - - - : - - - - : - - - - - -
- - - - - - - - - / - - - - : - - - - : - - - - - -
- - - - - 27/7 8:01 15:30 LP - - -
Name Date Start Stop
VPS
PDC
- -
1/3
Manual programming
Timer recording
/
- - - - - - - - - / - - - - : - - - - : - - - - - -
- - - - - - - - - / - - - - : - - - - : - - - - - -
- - - - - - - - - / - - - - : - - - - : - - - - - -
ARD 27/7 8:01 15:30 LP - - -
Name Date Start Stop
VPS
PDC
1
1/3
Highlighted line
is ready for
programming.
Timer recording
/
- - - - - - - - - / - - - - : - - - - : - - - - - -
- - - - - - - - - / - - - - : - - - - : - - - - - -
- - - - - - - - - / - - - - : - - - - : - - - - - -
ARD 27/7 8:01 15:30 LP - - -
Name Date Start Stop
VPS
PDC
1
1/3
Timer recording
/
- - - - - - - - - / - - - - : - - - - : - - - - - -
- - - - - - - - - / - - - - : - - - - : - - - - - -
- - - - - - - - - / - - - - : - - - - : - - EP - - -
ARD 27/7 8:01 15:30 LP
- - -
Name Date Start Stop
VPS
PDC
1
1/3
Timer recording
/
- - - - - - - - - / - - - - : - - - - : - - - - - -
- - - - - - - - - / - - - - : - - - - : - - - - - -
ARD 27/7 8:01 15:30 LP - - -
Name Date Start Stop
VPS
PDC
1
1 ARD 29/7 17:01 18:30 LP
- - -
1/3
VHS
75VGN.book 54 ページ 2004年7月21日 水曜日 午前11時54分
