


■
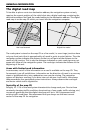
Setting the mounting angle
In order to ensure perfect functioning of the system, the navigation radio must be set
to the actual mounting angle in the instrument panel.
1. In navigation mode:
Select the “Mounting angle” option in the “System settings” menu.
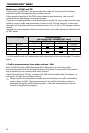
2. Depending upon the installation, set the angle to between -10 and +30 degrees. The
system does not differentiate between negative and positive angles. Thus, even for a
mounting angle of e.g. -10 degrees, set a value of “10” in the menu.
■
Loudspeaker test
To check that the loudspeakers are connected correctly, ➽ page 37.
■
Setting the time zone and time format
To set the desired time format (12 or 24-hour) and the time zone appropriate to your
location, ➽ page 37.
Checking the vehicle functions
A
Check the safety-relevant vehicle functions only when the vehicle is stationary, or
moving at low speed. Only perform the check in an open area.
Brake system, alarm system, lights, immobiliser, speedometer, trip computer, clock.
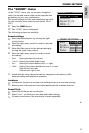
Checking GPS reception and calibrating the system
Enter a destination and select “Guidance”. Call up the “GPS / Compass” information
menu via the guidance screen (see operating instructions) and check the number of
satellites. For a sufficiently exact location determination, the number should be
between 4 and 8.
As soon as adequate GPS reception is available, perform a short test drive (approx. 10
minutes) on digitised roads in order to calibrate the system. Calibration takes place
fully automatically. Turn off several times and drive through a number of junctions.
Then check whether the navigation system indicates the correct vehicle position in the
“Car position” information menu.
Note: The system can also be calibrated without C-IQ contents activated. However, no
directional information will be provided. The current vehicle position can then be
checked in the emergency menu (see operating instructions).
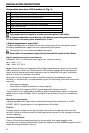
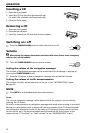
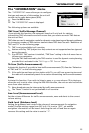
Removing the radio, Fig. 14
The radio can be released using the pair of U-shaped removal tools supplied.
☞
Push both U-shaped tools into the small holes to the right and left of the unit front
until they are felt to engage.
☞
Gently push the tools outwards and carefully pull the radio out of the installation
bracket using the tools.
INSTALLATION INSTRUCTIONS
20