


25
Overview
1 Select Setup menu from the Main menu
- then Calibrate monitor
2 Select each monitor and set calibration level
using the CD
Calibration procedure
The calibration has to be made to ensure that all monitors
produce the same sound pressure level in the listening
position when fed with the same signal.
The level of the input signal can be locked to a specific
sound pressure produced by the monitors.
Interchannel calibration
In the main menu:
• Select Setup menu
• Then select Calibrate monitor
• Select monitor Master L front
Now you can read the settings of this monitor.
• Set the Calib to 0.0 dB
• Start the CD and play track 11/23 (two channel stereo)
or track 11 (multi channel DTS)
The tracks contain 500 Hz – 2 kHz filtered Pink Noise.
Now: the sound pressure level is “measured” or registered
by ear.
Continue to the next channel. Using the Calib adjust to set
the same level as the first monitor. If using a multi channel
set up continue to the next monitors.
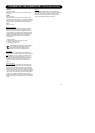
Acoustic level calibration
In some parts of the audio industry the monitoring system
has to be related to absolute acoustic levels.
On the CD, the tracks mentioned above are recorded at
–20 dBFS. This level correspond to different acoustic levels
depending on the kind of business you are in:
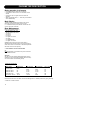
Film Video Music
83 dB(C) 78 dB(C) 78-93 dB(C)
• Select the first monitor (L).
• Play the track on the CD related to this monitor.
• Set Calib to 0.0 dB.
• Adjust the global volume until the desired C-weighted
level is obtained on a sound level meter in the listening
position.
• Go on to the next monitor
• Adjust Calib till the same C-weighted level is obtained
from this monitor.
• Continue the procedure until all monitors are calibrated.
• Exit calibration.
Read more on pages 38-39.
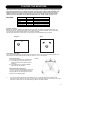
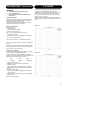
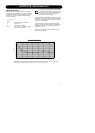
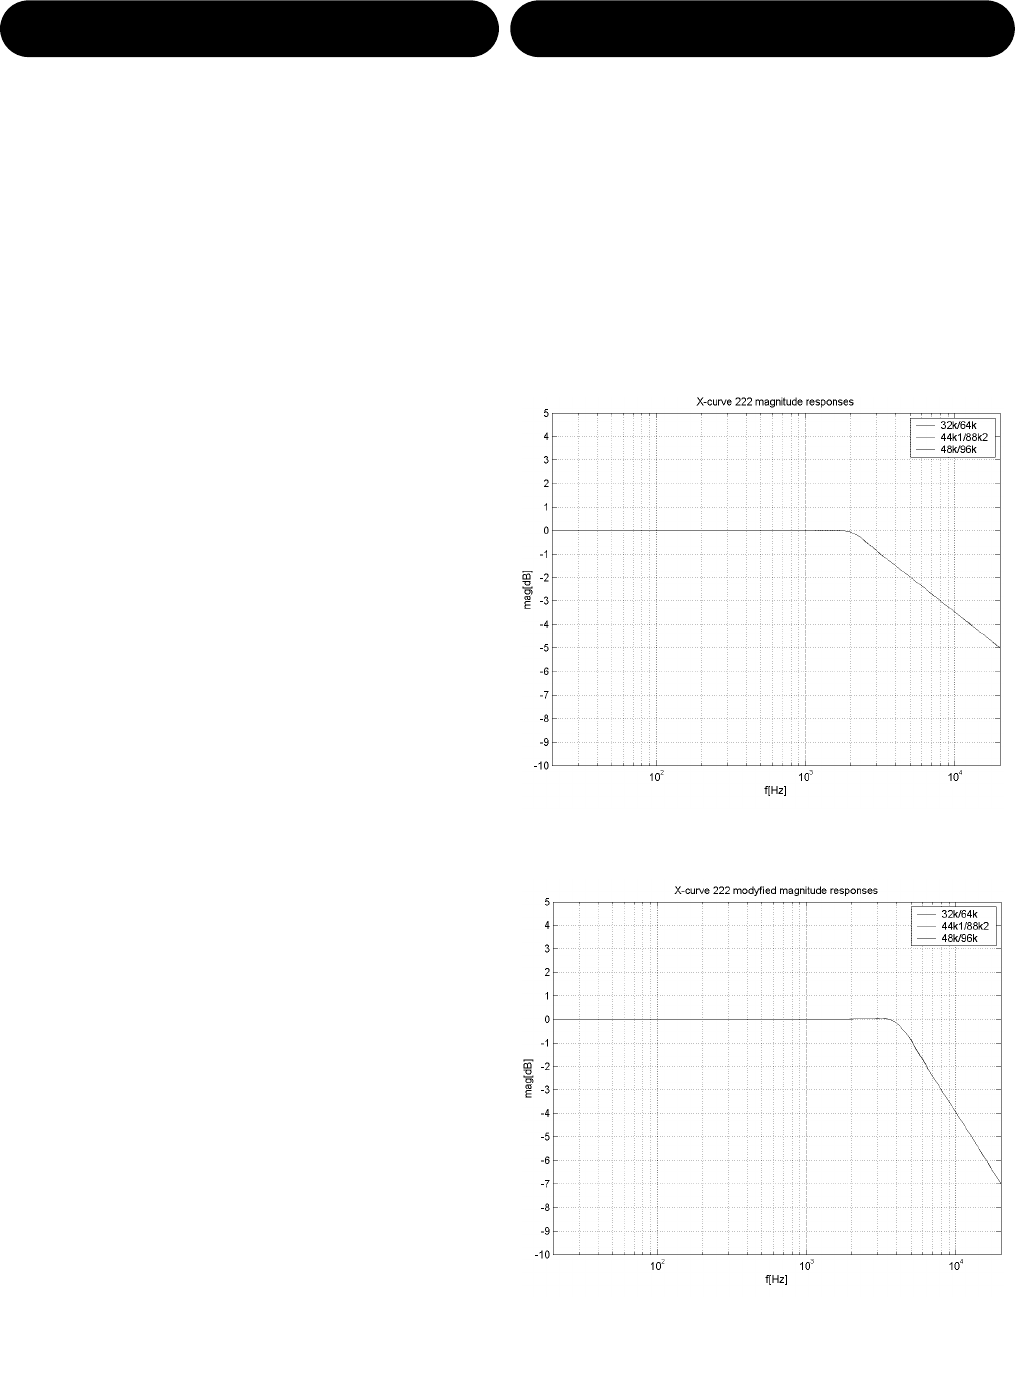
CALIBRATING - MAIN MONITORS X-CURVES
For small rooms, defined as less than 5300 cubic feet or
150 cubic meters, ANSI/SMPTE 222M calls for a
modification of the X-curve with flat natural response to 2
kHz and then a 1.5dB per octave roll off above 2 kHz.
This curve is useful when mixing in a small room and be
playing back in a large room.
Another variation on the curve is to begin the high end roll
off at 4 kHz and roll off 3dB per octave instead of 1.5 per
octave.
X-Curve 1
X-Curve 2