


23
CHECKING - THE PLACEMENT OF THE MONITORS
Overview
1 In the Setup menu: Select setup type (e.g. 5.1 or
stereo) matching your application
2 Check the phase (using the CD)
3 Check the monitor positions (using the CD)
4 Equalize the monitor (using the Bass and Treble
parameters)
5 Go to: Calibrate monitor
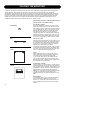
Select correction
In the main display select Recall preset now you can
choose from a number of possibilities depending on the
way the monitors are positioned in the room:
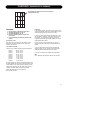
Room positions can be selected via the menu:
Setup - Calibrate - Position
• Neutral • Console
• Wall • Console Wall
• Corner • Console Corner
• Select the one that matches your case.
• Select Volume in the main menu to leave preset menu.
• Set the volume: -10 dB
• Test signals on CD. With the AIR monitors you received
a CD containing a lot of useful test signals to be used for
setting up of the monitors.
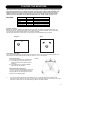
Phase checking
First procedure to be carried out is phase checking.
A number of signals both for two-channel stereo and for
multi channel reproduction are provided with the CD.
T
wo channel stereo:
Use track 45-49. L/R signals are presented in phase and
subsequently out of phase.
Multichannel:
Use the tracks 45-64 which contains DTS encoded signals
pairwise comparable: L/R, L/C, L/LS, R/RS. If you do not
have a DTS-decoder you may do the routing of the stereo
L/R signals to other channels in your mixing console.
Checking by ear when listening to the signals:
In phase:
You will hear more bass and the sound coming from a fixed
point between the monitors.
Out of phase:
You will hear the sound image loose bass, the sound
image is diffuse, and the directional information is blurred.
If you already have a phase checking
measurement system that can be used as well.
Checking the placement
When checking the placement of the monitors you first of
all have to focus on the low frequencies. So the signals to
be used are the low frequency sweeps as you find on the
CD from track 31 to 39.
Low -frequency sweeps
The tracks 31 to 39 contains the following sweep
sequences
Track 31: 200 Hz – 20 Hz
Track 32: 160 Hz – 20 Hz
Track 33: 125 Hz – 20 Hz
Track 34: 100 Hz – 20 Hz
Track 35: 80 Hz – 20 Hz
Track 36: 63 Hz – 20 Hz
Track 37: 50 Hz – 20 Hz
Track 38: 40 Hz – 20 Hz
During the sweeps you will hear short “bleebs” telling when
the signal passes one of the ISO center frequencies. (See
tables in appendix)
There are two “bleebs” every time the frequency passes a
whole octave center frequency and one “bleeb” every time
the in-between 1/3-octave center frequencies are passed.
Play all the tracks using only one monitor at a time.
Evaluation
In the listening position you should hear the signal smooth
and even throughout all frequency sweeps (bearing in mind
that the frequency response of the ear is not flat).
If you have a sound level meter this should be set to “LIN”
with no frequency weighting. If the meter does not have a
LIN position you can use the C-weighting, though the
response is attenuated approximately 3 dB at 31.5 Hz and
approximately 6 dB at 20 Hz.
In the background reading (page 43) you can find
instructions on how alternatively to use a studio
microphone if you do not have a sound level meter.
If OK; continue to next chapter: Calibrating the monitor setup.
If not OK you must find new positions for the monitors.
You have to define at what frequency the response
becomes bad. It is a frequency just above this you should
select as the cross-over frequency between the main
monitors and a subwoofer. If not possible to find any good
positions for the main monitors or for the subwoofer you
should consider changing the acoustics of the room.
Equalization is a very common tool for the obtaining of a
more smooth frequency response for steady state signals
(like the sweeps). BUT remember: equalizing can never
repair bad acoustics.