


Personal Video Recorder 41
To set up the Personal Video Recorder
Click the Setup button in the TV control panel, then click
the Personal Video Recorder tab.
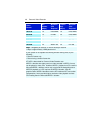
Selection Function
Recording
Preset
These settings
are dependent
upon your
system
configuration.
Each can be
customized.
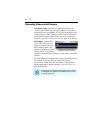
Check DVD, Good, Longer, Video CD, or Custom.
(The higher the quality, the less video you will be able to
store on a disk.)
Note: The Video CD setting lets you create Video-CD-
compliant files that can be played on most consumer
DVD players. To create a CD containing the Video CD
files, you need a writable CD drive and accompanying CD
creation software.
For extremely fine control, click the Map Preset button to
open the Recording Presets, where you can create and
modify preset recording formats.
Click the Create New... button to create a new recording
preset. The Recording Wizard guides you through the
process.
Click the Edit... button to create a modified copy of an
existing recording preset, or to edit one of your own
custom settings. The Recording Wizard will guide you
through the process.
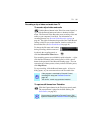
• Step 2 of the Recording Wizard
provides a deinterlacing option.
Select it to prevent horizontal streaks
(“combing”) in captured video.
The following, advanced recording settings are available
when you click the Map Preset button:
Time lapse recording
Record video-only, frame-by-frame and save it to an
MPEG-1 or MPEG-2 file. You can also manually trigger
recording from your keyboard, mouse, or other device.
You can use this feature to create stop-motion video (for
example, Claymation
®
-type video).
Click the Map Preset button, then click Time Lapse. To
edit the preset, click the Edit button, and follow the on-
screen steps.