


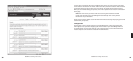


44 45
Standby and Reboot Options
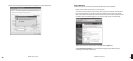
On the SoundBridge “Confi guration” Web page, under “Options”, you can specify how
SoundBridge behaves while in Standby mode and after powering up. Standby options include:
Display clock, Screen off. Reboot options include: Return to last state, Enter Standby, Reconnect
to last source, and Show Server List. (These options are useful if, for example, your SoundBridge
is connected to a power strip with other equipment, and you would like it to remain in standby
even after the power returns to the unit.)
WMA Lossless Transcoding
This is an option that only needs adjusting if you are having trouble with WMA Lossless
playback. Reducing the Bitrate will help SoundBridge tell the difference between WMA and
WMA Lossless based on the Bitrate of the stream. (For more information about this feature,
please visit Roku’s user forum at rokulabs.com/support.)
FLAC and Ogg-Vorbis Transcoding
You can use the FireFly Media Server to transcode your audio fi les from FLAC or Ogg-Vorbis to
be playable on SoundBridge. For more information about the FireFly Media Server, please see
the Music Server section of the Getting Started chapter of this manual.
Programming a Universal Remote Control
Roku has made available for download a “CCF fi le” with all of the remote control codes
supported by the SoundBridge and SoundBridge Radio. A CCF fi le is a remote control
confi guration fi le compatible with Pronto programmable universal remotes made by Philips
and other brands. Some other programmable universal remotes can also use or import CCF
fi les. Please consult the instructions for your particular remote control to see if you can use a
CCF fi le.
The SoundBridge CCF fi le includes all of the functions available on the standard SoundBridge
remote, as well as some additional special-purpose and direct-access commands that may be
of interest to some users. These functions include: discrete power on/off; stop; Preset keys for
all 18 Presets; keys for all the Browse options; and, keys to directly access Internet radio, AM/FM
radio (SoundBridge Radio only), and the last-used music server library.
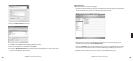
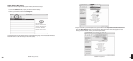
SECTION 10: OPTIONS FOR SYSTEM CONFIGURATION
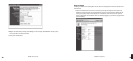
If you need to change your network settings or other system-level options, go to any Home
Menu and select “Change Library or Confi guration”. Choose “System Confi guration” at the
bottom of the next screen. You will see the following options:
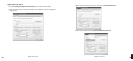
Software Version & Updates: This option shows you which software version you have on
SoundBridge and allows you to check if a newer version is available for download. SoundBridge
will notify you automatically when a new software update is available after coming out of
Standby mode. Use this option to check for new software manually.
Select Wi-Fi SSID & Password: This option allows you to check the name of the wireless
network to which you are connected and select another one. Use this option to enter your
network security key. See Appendix section “Wi-Fi Setup” for more information.
Show Wired Ethernet Status: This option displays your connectivity status, IP address and
MAC address, among others.
Show Wi-Fi Status: Displays Wi-Fi signal strength.
Network Control: Enables or disables control of SoundBridge by a remote UPnP device.
Reset to Factory Defaults: Reset to original factory settings. Important: This will erase all
Presets, Internet Radio favorites, network settings, and any other customizations made via the
Settings menu or web page.
Restart SoundBridge:
Power cycles SoundBridge and reboots the system.
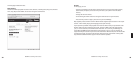
Safe Mode
Safe Mode runs automatically in the unlikely event that Soundbridge software becomes
corrupted. While in Safe Mode you can download a new version of software from Roku or
restore factory settings. When Soundbridge enters Safe Mode, you will see the text “Safe
Mode” displayed superimposed over the Roku logo during the startup animation.
Safe Mode can also be entered manually by powering Soundbridge off by unplugging it from
power, then plugging it in again while pressing and holding any button on the remote control
during boot-up.
10
Section 9: Advanced Features Section 10: Options For System Confi guration