


INSTALLING THE BATTERIES
15
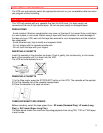
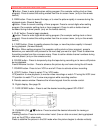
INSTALLING THE BATTERIES
1 ) Open the battery compartment cover by pressing the cover on the remote unit in the
direction of the arrow.
2) Insert 2 "AA" penlight batteries into the battery compartment in the direction indicated by the
polarity (+/-) markings.
3) Replace the cover.
Note to CATV system installer
This reminder is provided to call the CATV system installer's attention to Article 820-40 of the
NEC that provides guidelines for proper groundling and, in particular, specifies that the cable
ground shall be connected to the grounding system of the building, as close to the point of
cable entry as practical.
PRESET FOR USE
Channel memory programming is NOT needed when connected to a cable box. You can
program the tuner to scan only the channels you receive in your area. See page 40 for
channel designations.
NOTE: You must use the remote control for this procedure.
AUTOMATIC CHANNEL PRESET (Without a Cable Box)
NOTES:
· Follow the steps below only when you plug the VCR power core into a standard AC outlet for
the first time. If you unplug the VCR and move it to another area, you need to "CHANNEL
PRESET AGAIN". In this case, see "CHANNEL PRESET AGAIN" on page 14.
· You must follow the steps below before attempting to play or record a video tape. If you want
to play or record a video tape BEFORE
programming the tuner, you must first press the
POWER button to turn off the VCR. Then, press the POWER button again to turn it back on.
To program the tuner again, see "CHANNEL PRESET AGAIN" on page 14.
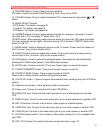
1 Plug in the VCR power cord
Plug the VCR power cord into a standard AC outlet. The "- - : - -" indicator flashes on the
display.
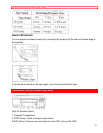
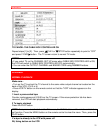
2 Select channel 3 or 4 on the TV
Turn on the TV and set the TV to the same video output channel as located on the back of the
VCR. (CH3 or CH4)
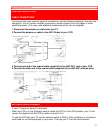
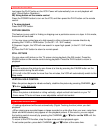
3 Turn on the VCR
Press the POWER button to turn on the VCR. The "PWR." indicator appears on the display.
4 Select the VCR mode