47
Recording
3.
Play the sound to record into the microphone.
fig.inputlevel-e.eps_80
4.
Adjust the volume.
Adjust the input volume gradually by pressing the [Input
Level Buttons] on the remote while the sound is playing.
The further to the right the level meter moves, the greater the volume of the audio that’s being
recorded. Adjust by pressing the [Input Level Buttons] to allow for the loudest recording.
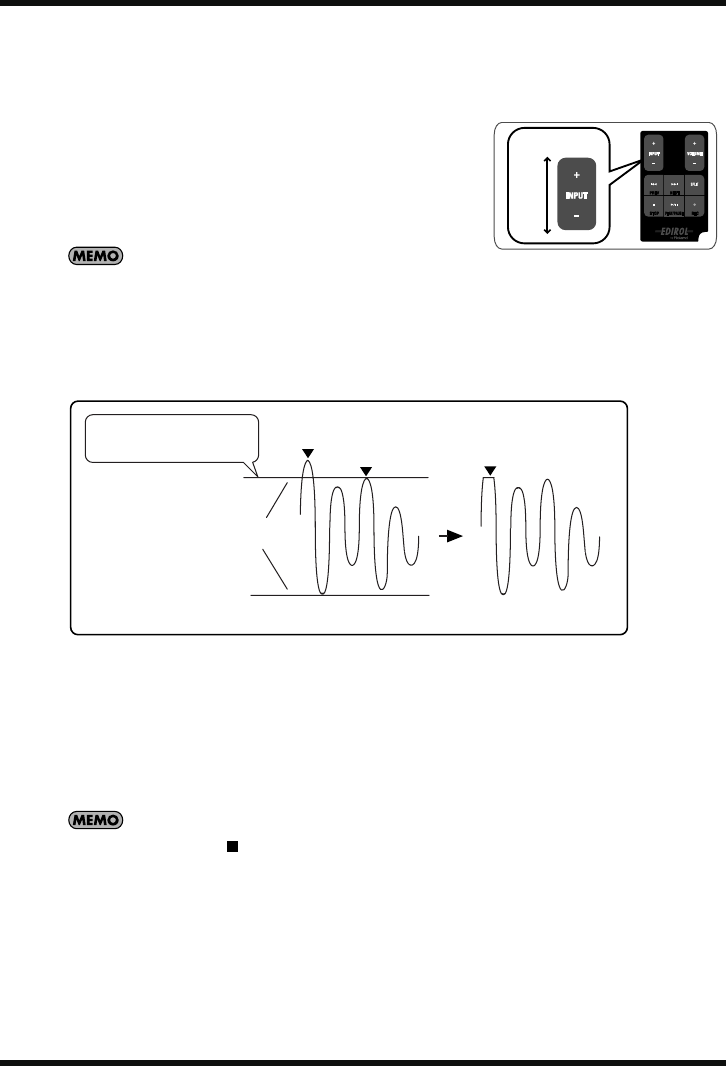
However, when the remote indicator blinks faster than usual, the input volume is too loud. The
remote indicator blinks at a fast rate when the input volume has reached the maximum input
volume that the R-09HR can record (clipping stage), and any louder sounds cannot be
recorded at the original volume.
In such situations, the resulting recording will be severely distorted.
fig.level.eps-e_80
Use the [Input Level Buttons] to adjust the volume so that the remote indicator does not
blink faster (clipping stage is not reached) even when the loudest sound is produced
by the recording target. Doing this prevents clipping during the loudest parts of a song
or during instrumental passages played fortissimo.
Once the level setting is finished, press the [REC Button] on the remote control once
more to start recording.
• Press the [STOP Button ] to stop the recording. Because the level settings are maintained, the
[REC Button] can be pressed again to start recording at the same input level.
• Some noise may be heard when the input level is being adjusted with the [Input Level Buttons].
This is not a malfunction.
Low
Volume
High
Beyond this level
clipping occurs
Waveforms are clipped
and sound is distorted
Level range
for R-09HR recording
Clipped
Input sound
waveform
Recording
waveform
Remote indicator
blink fastly
R-09HR_e.book 47 ページ 2007年12月17日 月曜日 午後2時16分


