


Filename [MX1S_12Subsidiary.fm]
Masterpage:Left+
84 EN
SUBSIDIARY SETTINGS
Page 84Saturday, 30 October 2004 16:18
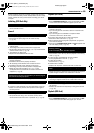
You can change various mode settings on the Function Set
screen.
To change the settings of these modes, find the desired mode in
the menu (for details on each menu, see pages 84 through 85),
then follow the procedure below.
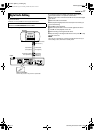
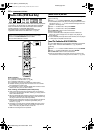
1 Press VHS so that the VHS lamp lights up on the unit.
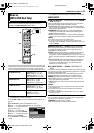
2 Press SET UP to access the
Function Set screen.
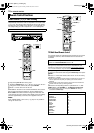
3 Press rt to select the item you
want to change, then press ENTER
or e to select the desired mode.
4 Press SET UP to complete the
setting.
*The boldface settings below indicate the settings at your purchase.
FUNCTION
8 PICTURE CONTROL — NORM / EDIT / SOFT / SHARP
This feature helps you to adjust the playback picture quality
according to your preference. Normally select “NORM”.
NORM: Picture quality is adjusted automatically.
EDIT: Minimizes picture degradation during editing (recording and
playback).
SOFT: Reduces image coarseness when viewing overplayed tapes
containing a lot of noise.
SHARP: Clearer, sharper-edged picture when viewing images with
lots of flat, same-colored surfaces such as cartoons.
NOTES:
● When you select “EDIT”, “SOFT” or “SHARP”, the selected mode will
not change until you select another mode.
● When you select “EDIT” to dub tapes, be sure to select “NORM” after
you finish dubbing the tapes.
8 SUPERIMPOSE — AUTO / OFF
When this function is set to “AUTO”, various operational indicators
appear on the TV screen. Messages appear in the selected
language. (੬ pg. 21)
NOTES:
● Even when “SUPERIMPOSE” is set to “OFF”, you can display the
various operational indicators by pressing ON SCREEN. To clear the
operational indicators, press ON SCREEN again.
● When you use this unit as the source player for editing, be sure to set
“SUPERIMPOSE” to “OFF” before starting.
● During playback, the operation mode indicators may be disturbed
depending on the type of tape being used.
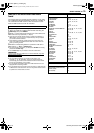
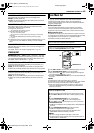
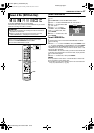
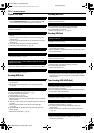
8 AUTO SP]EP TIMER — ON / OFF
When this function is set to “ON”, the unit automatically switches to
EP mode to allow complete recording if there is not enough tape to
record the entire program while timer-recording in SP mode.
For Example:
Recording a program of 140 minutes in length onto a 120-minute
tape.
Make sure you set this function to “ON”, before the timer-recording
starts.
NOTES:
● If you have programmed the unit to timer-record 2 or more programs,
the second program and those thereafter may not fit on the tape if
you set “AUTO SP]EP TIMER” to “ON”. In this case, make sure the
mode is not engaged, then set the tape speed manually during timer
programming.
● In order to ensure that the recording fits on the tape, this feature may
leave a slight non-recorded section at the end of the tape.
● There may be some noise and sound disturbance at the point on the
tape where the unit switches from SP to EP mode.
● The Auto SP]EP Timer feature is not available during ITR (Instant
Timer Recording), and the feature will not work properly on the
following tapes: T(ST)-30, T(ST)-60, T(ST)-90, and T(ST)-120.
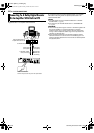
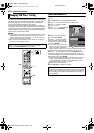
Mode Set
(VHS Deck Only)
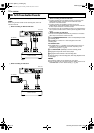
● Turn on the unit.
● Turn on the TV and select the video channel (or AV mode).
● Slide the TV/CABLE/DBS/DVD switch to DVD.
rtwe
SET UP
ENTER
VHS
CABLE/DBS
DVDTV
( , ) THEN (ENTER)
(SET UP) TO END
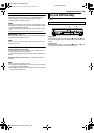
FUNCTION
PICTURE CONTROL NORM
SUPERIMPOSE AUTO
AUTO SP
EP TIMER OFF
VIDEO STABILIZER OFF
BLUE BACK ON
2ND AUDIO RECORD OFF
SP mode EP mode
Total 140 minutes
Approximately 110 minutes
Approximately 30 minutes
MX1S_00.book Page 84 Saturday, October 30, 2004 4:18 PM