


Masterpage:Right+
EN 39
Filename [MX1S_06DVD Operation.fm]
BASIC OPERATIONS ON DVD DECK
Page 39Saturday, 30 October 2004 16:18
Setting The Progressive Mode
You can obtain optimal picture quality by selecting whether the
content on the disc is processed by field (video source) or by frame
(film source).
1 Set the unit to the progressive scan mode. (੬ pg. 83)
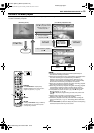
2 Press ON SCREEN twice to access the on-screen bar.
3 Press we to select “ ”, then press ENTER. The pop-up
window appears under the selected item.
4 Press rt to select the desired option, then press ENTER.
AUTO: This mode automatically detects film and video content for
progressive playback. When film content is found, flag detection
is used to invoke playback of film data in full screen. When video
content is found, pictures from multiple fields are used to detect
sections with movement, and then this movement undergoes
advanced image processing for output of sharp, detailed
progressive images without any reduction in image quality where
movement occurs. Normally, operation in this mode is
recommended.
FILM: Suitable for playing back a progressive scanned film source
disc.
VIDEO: Suitable for playing back a video source disc. The outlines
on the played back pictures will be soft.
To clear the on-screen bar
Press ON SCREEN.
Program Playback
You can program up to 30 tracks (Video CD/SVCD or Audio CD) to
play back in the desired order.
While stopped
1 Press ON SCREEN twice to access the on-screen bar.
2 Press we to select “PRGM”, then press ENTER. The program
table appears under on-screen bar.
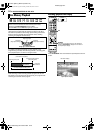
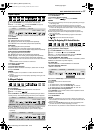
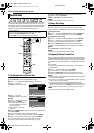
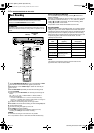
3 Press the number keys to
enter the track numbers in the
desired order.
Examples:
A To select track 5, press the
number key “5” and ENTER.
B To select track 15, press the
number key “1” and “5”.
C To select track 25, press the number key “2” and “5”.
If you have specified a wrong selection
Press CANCEL (&). The last selection is erased.
Or press CLEAR (8). The whole selection is erased.
4 Press 4. Playback starts in the programmed order.
● When all of the programmed tracks have been played back, Program
Playback stops, but the programmed information remains.
● To add tracks to the end of the program, perform steps 1 through 3.
● During Program Playback, pressing 6 skips to the next selection
of the program. Pressing 2 returns to the beginning of the current
selection.
To clear the on-screen bar and the contents of the program
Press ON SCREEN.
To cancel Program Playback
Press we to select “PRGM”, then press ENTER.
NOTE:
Program Playback is not possible depending on the type of disc.
Random Playback
You can play back all the tracks on the disc in random order.
While stopped
1 Press ON SCREEN twice to access the on-screen bar.
2 Press we to select “RND”, then press ENTER. Playback starts
in random order.
To clear the on-screen bar
Press ON SCREEN.
To cancel Random Playback
Perform steps 1 and 2.
NOTE:
The same track will not be played back more than once during Random
Playback.
Select The Switching Interval Of The Slide Show
You can control the switching interval of the slide show.
1 Press ON SCREEN twice to access the on-screen bar.
2 Press we to select “ ”, then press ENTER. The pop-up
window appears under the selected item.
3 Press rt to select the desired option, then press ENTER.
● Each time you press rt, the interval changes as follows:
5 SEC. { 10 SEC. { 15 SEC. { 20 SEC. { 25 SEC. {
30 SEC. { (Back to the beginning)
To clear the on-screen bar
Press ON SCREEN.
NOTE:
JPEG files are played back as a slide show. It may take more time to
display an image with larger file size.
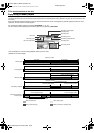
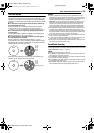
CHAPTER 99 EACH 0:00
DVD-
VIDEO
TITLE 99
3D-ON CINEMA AUTO
TRACK 99 EACH 0:00
VCD
CINEMA
TRACK 99 EACH 0:00
VCD
CINEMA
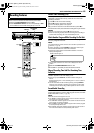
TRACK 99GROUP 99
5 SEC.
JPEG
MX1S_00.book Page 39 Saturday, October 30, 2004 4:18 PM