


Filename [MX1S_08VHS Operation.fm]
Masterpage:Left+
52 EN
BASIC OPERATIONS ON VHS DECK
Page 52Saturday, 30 October 2004 16:18
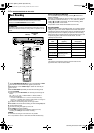
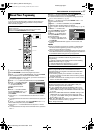
Next Function Memory
The Next Function Memory “tells” the unit what to do after
rewinding. Before continuing, make sure the unit is in the Stop
mode.
For Automatic Start Of Playback
Press 3, then press
4 within 2 seconds.
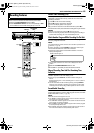
Repeat Playback
Your unit can automatically play back the whole tape 100 times
repeatedly.
1 Press 4 to start playback.
2 Press and hold 4 for over 5 seconds, then release.
● lights up on the front display panel.
● After playing back a tape 100 times, the unit stops automatically.
3 Press 8 at any time to stop Repeat Playback.
● Pressing 4, 3, 5 or 9 also stops Repeat Playback.
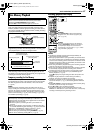
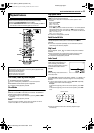
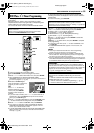
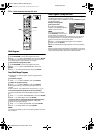
Manual Tracking
Your unit is equipped with automatic tracking control. During
playback, you can override this and adjust the tracking manually by
pressing the CH buttons.
1 During playback, press CH + or – on the unit simultaneously to
activate manual tracking.
2 Press CH + or – to adjust the tracking manually.
● To return to automatic tracking, press CH + or – simultaneously or
eject and insert the tape again
.
NOTE:
When a new tape is inserted, the unit enters the automatic tracking
mode automatically.
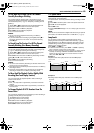
Soundtrack Selection
Your unit is capable of recording three soundtracks (HI-FI L, HI-FI
R and NORM) and will play back the one you select.
During Playback
Pressing AUDIO changes the soundtrack as follows:
NOTES:
● “HI-FI” should normally be selected. In this mode, Hi-Fi stereo tapes
are played back in stereo, and the normal audio track is played back
automatically for tapes with only normal audio.
● “SUPERIMPOSE” must be set to “AUTO” or the on-screen displays
will not appear. (੬ pg. 84)
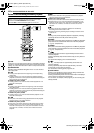
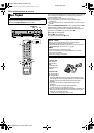
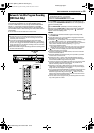
VHS Progressive Scan
You can watch the images on VHS deck in the Progressive scan
mode via component video.
A
TTENTION:
Your TV needs to be compatible with Progressive and to have
Component video input connectors.
1 Set the Progressive-compatible TV to the component input
mode.
2 Press HDD or DVD so that the HDD or DVD lamp lights up on
the unit.
3 Press PROGRESSIVE SCAN for 3 or more seconds.
● The video output indicator lights up on the front display panel.
4 Press VHS so that the VHS lamp lights up on the unit, then
press PROGRESSIVE SCAN.
● “COMP OFF” is displayed on the front display panel. It will be
displayed for 5 seconds.
5 Press PROGRESSIVE SCAN again within 5 seconds.
● “COMP ON” is displayed on the front display panel.
● The VHS progressive scan image will then be outputted from the
[COMPONENT VIDEO OUT (Y/P
B
/P
R
)] connectors.
NOTES:
● Be sure to engage the HDD or DVD deck in stop mode.
● To disengage the VHS Progressive Scan mode, perform steps 4 and
5 to switch to “COMP OFF”.
TRACK
USE
On-Screen Display
HI-FI Hi-Fi sound is played back
HI-FI L Sound on the left Hi-Fi channel is
played back
HI-FI R Sound on the right Hi-Fi channel is
played back
NORM Sound on the normal track is played
back
NORM
HI-FI
Both sounds on the Hi-Fi track and
normal track are mixed and played
back
MX1S_00.book Page 52 Saturday, October 30, 2004 4:18 PM