3-45
User Guide for Cisco Digital Media Encoder 2200
OL-17938-01
Chapter 3 Using the Ease Menu and Niagara SCX Web Interface
Niagara SCX Web Interface
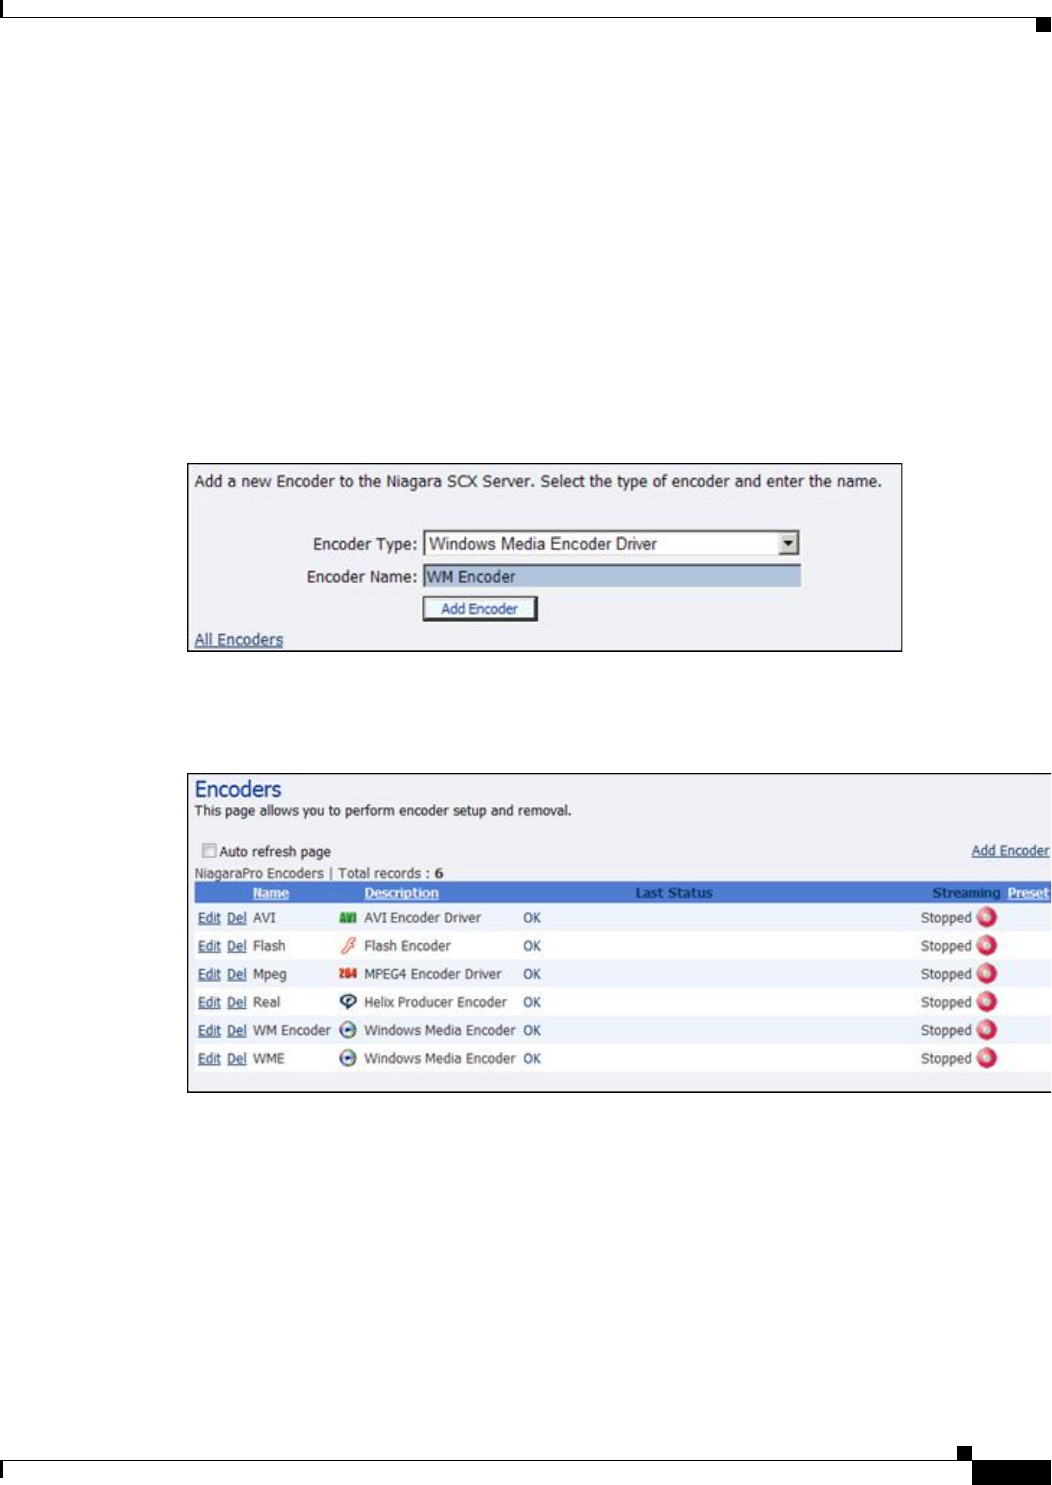
On the next screen, select the encoder type from the drop-down menu. There are four different types of
encoders installed in the Cisco
Digital Media Encoder 2200:
• AV I : An uncompressed audio and video file format
• Flash: An audio and video and streaming file format typically embedded in Flash-authored
interactive content
• MPEG-4: An audio and video file and streaming format
• RealVideo: An audio and video file and streaming format
• Windows Media: An audio and video file and streaming format
After you have made your selection, give the encoder a unique name. Keep in mind that only the first 11
characters of the encoder can be displayed on the encoder’s LCD display. Click the Add Encoder button
when finished.
You then return to the All Encoders page. The new encoder you created is added to the encoder list. You
can then edit that encoder by clicking the Edit link next to the encoder name. Read the
“Edit Encoder”
section on page 3-22 for information on how to edit the encoder you just created.
Encoder Preset (A, B, & C)
The Cisco Digital Media Encoder 2200 provides one-button streaming via the EZStream buttons located
on the front panel of the encoder. By default, these buttons are not assigned to an encoder. The Niagara
SCX Web Interface is used to configure each button to a specific encoder. The controls to configure these
buttons are located in the Encoder Preset A, Encoder Preset B, and Encoder Preset C pages.


