


50
51
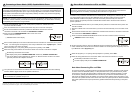
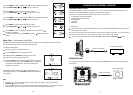
Sleep Timer (On Remote Control Only)
Turn the system on and operate as usual.
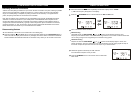
Press the SLEEP button on the remote control.
The display will show “
SLEEP 90
” indicating that the sleep
timer will shut the power off after 90 minutes.
Note:
You can shut the unit off manually before the Sleep Timer counts down to “00” by pressing the
STANDBY/ button at any time.
If you are falling asleep to CD, the system will only operate until the CD ends. If you set the Sleep Timer
for 90 minutes but your CD is only 45 minutes long, the music will stop after 45 minutes.
This system includes a programmable Sleep Timer that allows you to fall asleep to between 10 and 90
minutes of music and then shuts the power off automatically.
OTHER FUNCTIONS
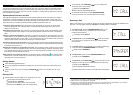
Setting the Wake Timer
(On Remote Control Only)
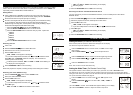
When the AC power is connected, “AM 12:00” will appear on the display.
The clock can only be se
t while the unit is off.
Setting the Clock
(On Remote Control Only)
Note: This unit uses 12 hour time format only.
Press the PROG/CLK button to confirm.
Press the
PROG/CLK
button on remote control, the
“AM”
and hour digits
begin to flash.
Press the SKIP/TUNING or buttons to adjust the hour.
Press the
PROG/CLK
button to confirm. The minute digits begin to flash.
Press the SKIP/TUNING
or buttons to adjust the minute.
This system includes a timer to allow you to wa
ke up to your iPod, CD, radio or MP3/WMA music.
The wake timer can be set only while unit is off. Please ensure the clock is set
to the correct time before
setting the wake timer. If you wish to use the wake
timer with iPod, please make sure Wireless iPod Dock is
set up and connected. Please refer
page 32.
Press the
TIMER
button on remote control, and
“ON” appears on the
display.
Press the
FUNCTION /
button to select
“CD”
,
“USB”, “CARD”
or
“iPod/BT.”
Press
TIMER
to confirm. The VOLUME level appears flashing on the display.
Press the
VOLUME +/- buttons to adjust the volume output level.
Press
SKIP/TUNING
or to set the on time hour.
Press TIMER to confirm. Display shows “OFF” and hour digits begin to flash.
Press
SKIP/TUNING
or to set the off time hour.
Press
TIMER
to confirm. Display shows “ON” and hour digits begin to flash.
Press
TIMER
to confirm. Minute digits begin to flash.
Press
SKIP/TUNING
or to set the on time minute.
Press
TIMER
to confirm. The display reverts to the current time and
remains on the display.
To cancel the timer setting, press
TIMER once more, disappears from the
display.
Press
TIMER
to confirm. Minute digits begin to flash.
Press
SKIP/TUNING
or to set the off time minute.
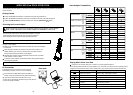
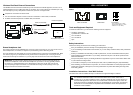
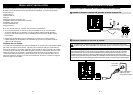
CONNECTING EXTERNAL DEVICES
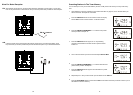
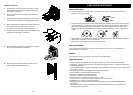
Examples of the types of external equipment that may be connected are:
Connect the audio output jack or headphone jack of the external audio equipment to the AUX IN jack on
the left panel of this system.
You may leave your external device permanently connect
ed to this system if you wish. It is not necessary to
disconnect the external device in order to listen
to the Tuner or CD player in this system.
External audio source
Cable (not included)
AUX IN
Powered Subwoofer
SUBWOOFER
OUT
This system includes an AUX IN Jack to allow you to connect external audio equipment and listen to the
sound from the external equipment through the speakers of this system.
AUXILIARY INPUT JACK
SUBWOOFER OUT
You may connect a powered subwoofer to this system using SUBWOOFER OUT and an RCA-Type cable
(not included).
Cable (not included)
To use AUX IN:
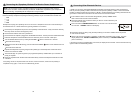
To operate the sleep timer
Press the SLEEP button to decrease the amount of sleep timer
operation. Each time you press the SLEEP button you subtract
10 minutes from the sleep timer. The minimum sleep timer
operation is 10 minutes.
After a few seconds the Sleep Time display disappears and the
normal display returns. The small SLEEP indicator remains ashing
in the display.
An MP3 player such as iPod shufe.
Audio outputs from DVD or VCR.
Cassette player.
Turntable.
MD player.
To listen to the external audio source select the “AUX” mode using the FUNCTION/ button.