31
SCANNER FUNCTIONS
SCANNER DRIVER SETTINGS
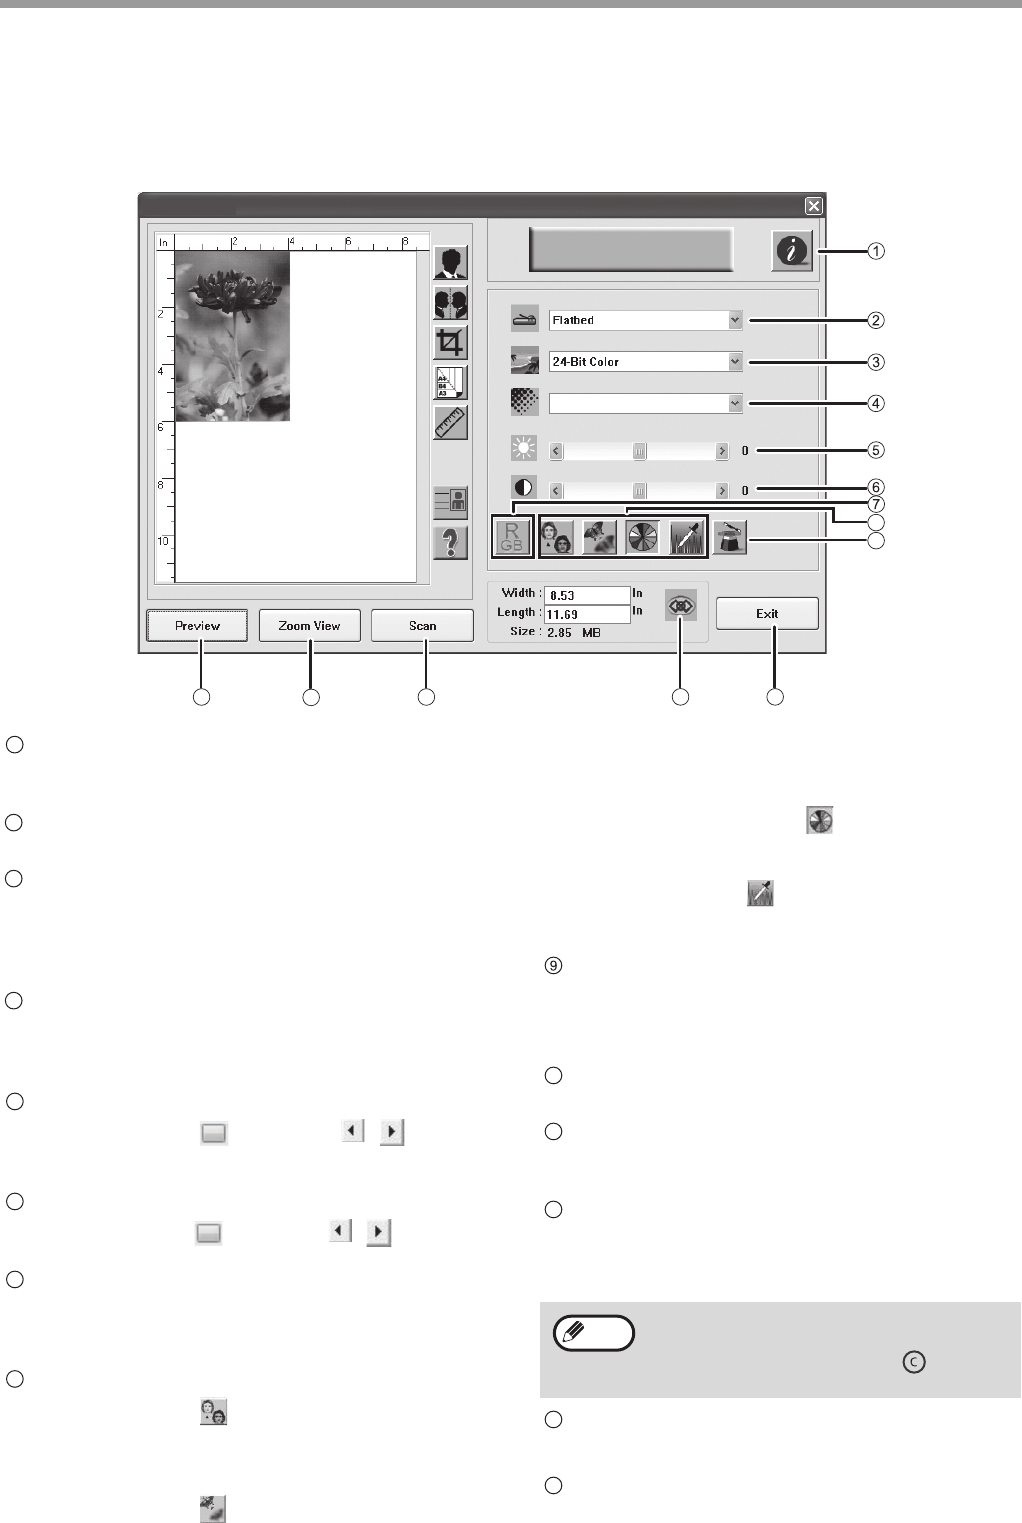
The scanner driver setup screen consists of the "Preview" screen, which enables you to select the scan setting
buttons and shows the scanned image. For details on the scan settings, click the "Help" button in the preview screen
to display Help.
"Scanner Information" button
To display the scanner information and driver
information.
Scan Methed menu
Platform scanning.
"Image Type" menu
The image types include "Black and White", "8-Bit
Gray" and "24-Bit Color". For details on the
settings, click the "Help" button in the preview
screen to display Help.
"Resolution" menu
The following resolutions can be selected from the
drop-down menu: 50dpi, 72dpi, 100dpi, 144dpi,
150dpi, 200dpi, 300dpi, 600dpi.
Brightness
Drag the scroll bar ( )
or use the ( , ) button
to change the brightness. The brightness range is
-100 to 100.
Contrast
Drag the scroll bar ( ) or use the ( , ) button to
change the contrast. The contrast range is -100 to 100.
"RGB Adjustment" button
Click this button to adjust the RGB of the image. This
button is highlighted when the "Image Type" is
selected "Black and White" or "8-Bit Gray".
Image enhancement tool
"Descreen" button ( )
Click this button to clear the common cloud patterns
in the prints. You can select "None", "Newspaper",
"Magazine" or "Catalog".
"Sharpen" button ( )
Click this button to enhance the scanned image. You
can select "None", "Light", "More", "Heavy" or "Extra
Heavy".
"Color Adjustment" button ( )
Click this button to adjust the image of the default
image color.
"Auto Level" button ( )
Click this button to adjust the brightest and darkest
zones in order to optimize the image.
"Advanced Setting" button
Click to display the advanced image setting tools.
For details on the settings, click the "Help" button
in the preview screen to display Help.
"Preview" button
To preview the original.
"Zoom View" button
Click this button to enlarge the preview image size to
the optimal size of the preview window.
"Scan" button
Click to scan an original using the selected settings.
Ensure that the settings are correct before clicking
this button.
"Lock Scaling" button
Click to lock the width to height ratio of the image.
"Exit" button
Click to exit the scanner driver setup screen.
8
9
1413
12
11
10
AL-XXXX
200
Sharp AL-XXXX
Sharp AL-XXXX
1
2
3
4
5
6
7
8
To cancel a scanning job after clicking the
"Scan" button, press the [Esc] key on your
keyboard or the "CLEAR" key ( ) on the
machine.
10
11
12
Note
13
14


