


29
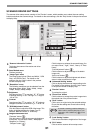
SCANNING FROM THE MACHINE
(SCAN to USB)
Send the scanned image to the USB memory connected to the machine according to the following steps. The
relevant file is saved in the USB memory.
Scanning from the operation panel of the machine
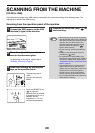
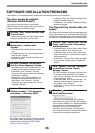
1
Connect the USB memory to the USB
interface (A type) of the machine.
2
Place the original that you wish to
scan on the document glass.
For placement of the original, please refer to
"NORMAL COPYING" (Page15).
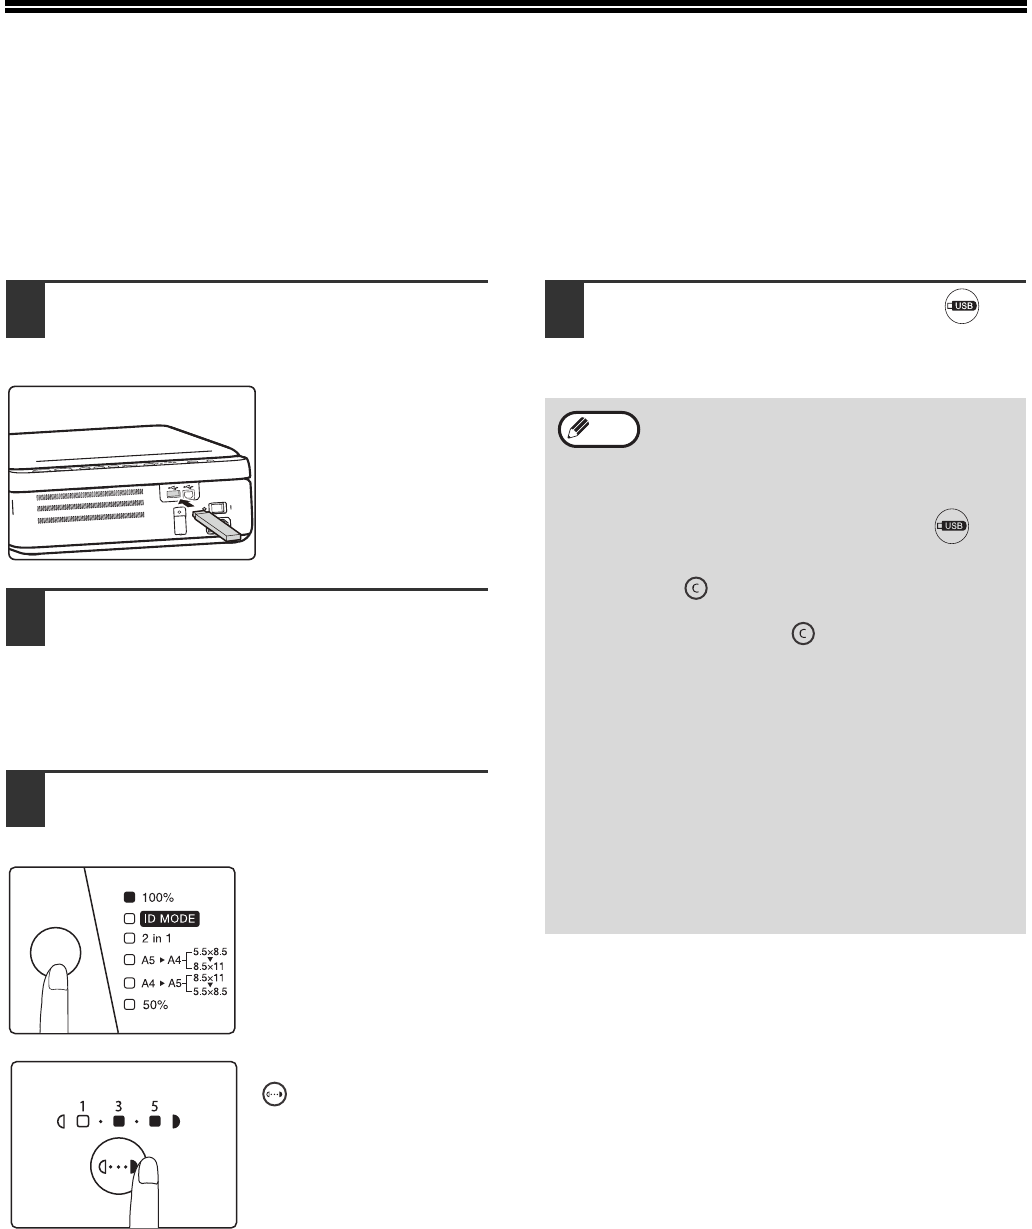
3
Select scan settings by pressing the
keys on the operation panel.
The scanning ratio is
100%.
You can also select ID
MODE.
Press the [DENSITY] key
( ) to adjust the
exposure level as needed.
If exposure level 2 or 4 is
selected, the two
indicators of 1, 3 or 3, 5
will light simultaneously.
4
Press the [SCAN to USB ] key ( ) to
start scanning .
• When scanning an ID card (ID card mode),
the LED indicator and ID Copy indicator will
flash after one side of the ID card has been
scanned. Turn over the ID card on the
document glass within 30 seconds and
press the [ SCAN to USB ] key ( )
again to finish scanning.
• To stop scanning, press the [CLEAR] key
().
• To return to the default state, press the
[CLEAR] key ( ) twice.
• For restrictions on COPY/PRINT in the
SCAN mode or the restrictions on SCAN in
the COPY or PRINT mode, please refer to
"OPERATION IN COPY, PRINT AND SCAN
MODE" (Page10).
• The storage folder for normal scanning is
different from that of ID card scanning.
(Please use your USB memory stick icon to
replace the "H" in the following paths.)
Normal scanning: H:\documents\Photo
ID card scanning: H:\documents\ID card
• Do not unplug the USB memory when the
USB indicator is flashing.
Note