


Lowrance - LHR-80 Installation and Operation Instructions 25
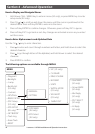
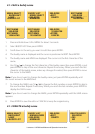
Hold down the CALL/ MENU key to enter radio set-up mode. This allows the following func-
tions to be accessed. Scroll down the list and press ENTER. To exit the Menu or sub-menu
modes press 16 or EXIT.
WAYPOINT Select the WP List Entry to enter names and LL positions for a WP.
Up to 500 WP can be stored.
BACKLIGHT Sets the backlight level, 8 levels are available.
LAMP Sets the Lamp timer.
BUDDY LIST Selects the Buddy List Entry to enter names and MMSI’s for
regularly called DSC stations. Up to 20 names can be stored (US only).
CONTRAST Selects display contrast setting: 1-4 levels.
GPS/DATA Define the display POS and Time, format, Offset and COG/SOG display
and GPS alert, GPS enabled and Bearing.
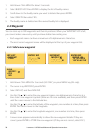
RADIO SETUP There are 7 items that can be customized, they are: Band, CH Name,
Ring Tone Volume, Beep Volume, Units, Watch mode, WX alert
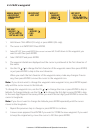
DSC SETUP There are 5 functions that allow user to change., they are: User MMSI
enter, Group MMSI, INDIV RELAY AND LL Relay (US only).
ATIS SETUP There are 2 functions that allow user to change: ATIS MMSI Enter, ATIS
Select. (EU Only).
GET BUDDY Enable or disable Buddy Data and Auto Function.
TRACK LOG Set the distance interval for recording the track points.
ERASE TRACE Whether erase all track history points.
RESET Resets factory settings.
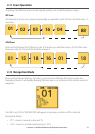
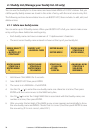
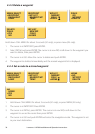
Set-up Menu Navigation
To access the Menu Mode:
press and hold CALL/MENU key, or press MENU key. Text area displays the Set-Up Menu •
list.
Press the 16 or ESC soft key to exit from the menu.1.
Press the CH 2. / to select the Item within the Set-Up Menu list. To confirm a selected
item, push ENTER soft-key.
Or use CH 3. / knob to enter alphanumeric or alphabet data.
To confirm a selected item, push ENTER soft-key. 4.
Turn unit off. All changes are saved to EEPROM.5.