


48
12 ¥~±µ¼v-µ³]³Æ (¿é¥X)
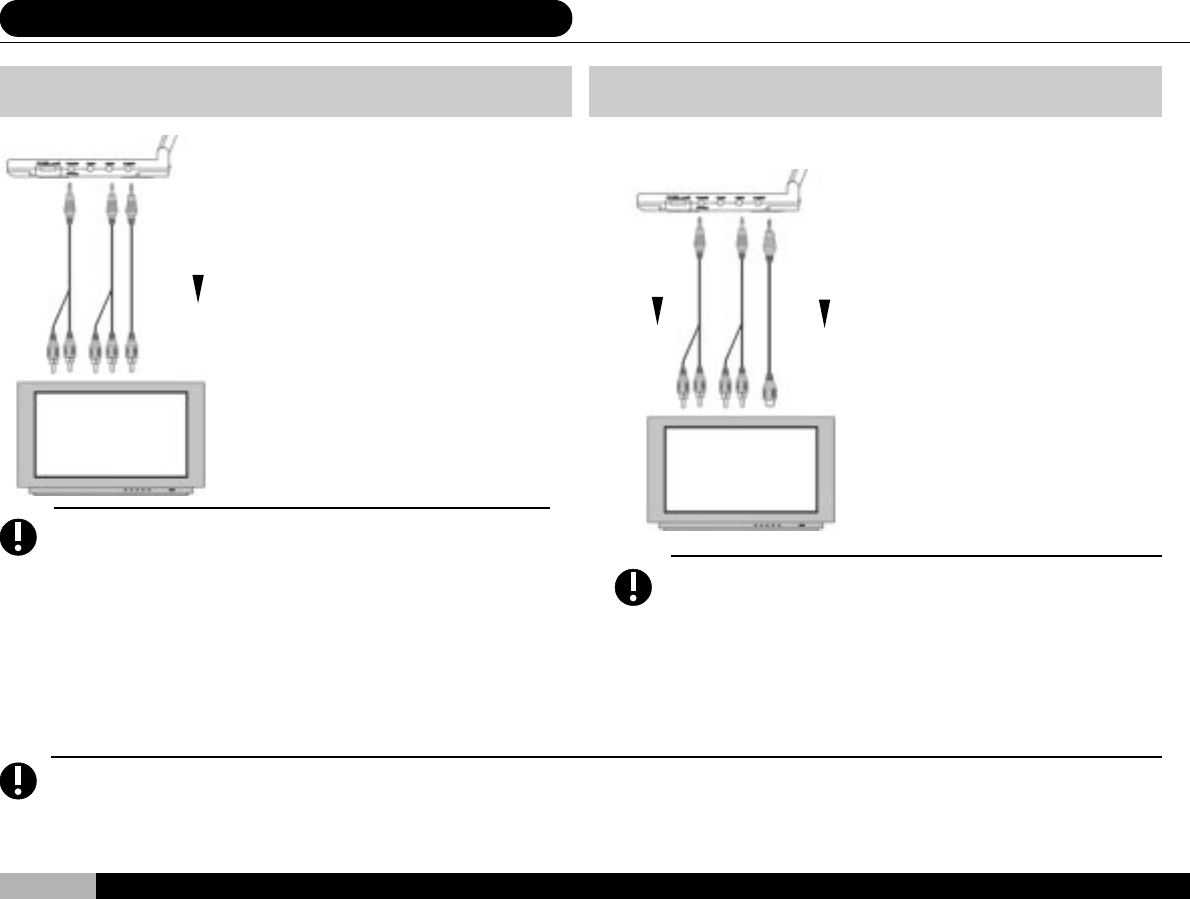
Please note that the AV signal cables are bundled in sets of
two with a white cable end intended to carry left speaker audio,
a red cable end for right speaker audio and a yellow cable end
for image signal data. The two wires are not structurally
different, but the colors are intended to aid in correct installation.
Please make sure that each output is plugged into the correct
peripheral input (e.g. yellow output plugs into yellow input, etc.).
Also, most modern electronic equipment must be manually
switched before input signals can be processed and displayed.
Please refer to the relevant owner’s manual to confirm how
this switch should be effected.
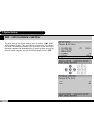
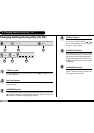
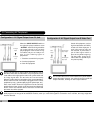
Configuration I: AV Signal Output from AV Jack
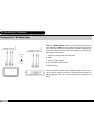
Configuration II: AV Signal Output from S-Video Port
When the” INPUT OUTPUT “switch on
the right of the player module is set to
“ OUTPUT ” the three AV signal cables
can output signals of the currently
played program. Connect the AV sig-
nal cables and you are ready to ex-
port to the following types of
peripherals:
1. Television set with AV input jacks
2. Overhead projectors
3. Other AV equipment
AV Signal
Output
AV Signal
Input
Certain AV equipment, such as
high-end televisions and VCRs,
include a S-Video input port. If
such is the case you may use
the included, or purchased, 4-
pin S-Video signal cable in
place of the yellow image sig-
nal data cable. Using the S-
Video cable can provide supe-
rior picture quality.
Please note that most DVDs have a copyright protection mechanism against illegal copying, so that when you try to use a recorder to record
DVD programs, the image will be distorted. Likewise, when you route DVD signals to a television via a recorder, the image might also
become distorted.
The S-Video cable can be used instead of the yellow cable to
output video data. However, the yellow AV signal jack will still
output video data, allowing for dual output if desired.
S-Video Digital
Signal Output
S-Video Digital
Signal Input
Audio
Output
Audio
Input
10. Connecting AV Peripherals