117
GB
Utilizing Your Computer
5 When the [Ready to Install the Program]
window appears, click [Install].
The installation starts.
6 When [Sound Organizer has been
installed successfully.] window appears,
check [Launch Sound Organizer Now],
and then click [Finish].
PNote
You may need to restart your computer after
installing Sound Organizer.
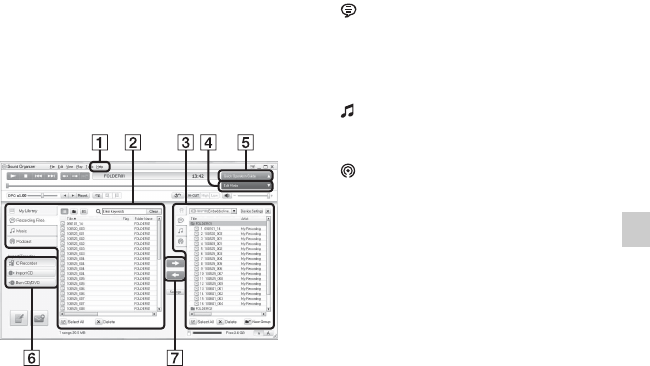
The Sound Organizer
window
A Help
Displays the help of Sound Organizer.
For details on each operation, refer to
these help files.
B The file list of Sound Organizer (My
Library)
Displays a list of files included in My
Library of Sound Organizer in
accordance with the operation.
Recording Files: Displays a list of
recording files.
Recording files that were recorded with
an IC recorder appear in this library
when they are imported.
Music: Displays a list of music files.
Songs imported from a music CD
appear in this library.
Podcast: Displays a list of podcasts.
C The file list of the IC recorder
Displays the files saved to the
connected IC recorder or memory card.
D Edit Mode button
Displays the edit area so that you can
edit a file.
E Quick Operation Guide button
Displays the Quick Operation Guide to
receive guidance on the basic features
of Sound Organizer.
