6
General control
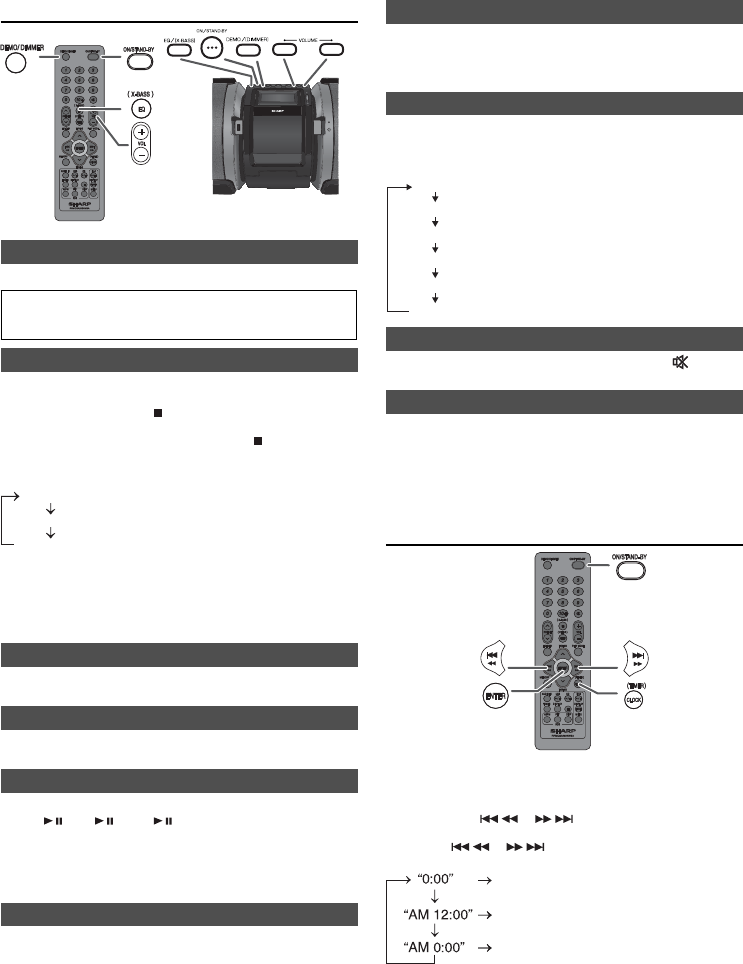
PORTABLE MUSIC BOOMBOX GX-M10
REMOTE
SENSOR
TIMER
To turn the power on
Press the ON/STAND-BY button to turn the power on.
After use:
Press the ON/STAND-BY button to enter the power stand-by
mode.
Display and Subwoofer light up control
The display and subwoofer light can be changed.
Main unit:
1) Press DEMO/(DIMMER)/
button for more than 3 seconds.
The current mode will be displayed.
2) Within 5 seconds, press DEMO/(DIMMER)/ button to change
the mode.
Remote control:
Press DEMO/DIMMER button to change the mode.
MODE 1
MODE 2
MODE Off
(Display backlight on and Subwoofer light off)
(Display backlight on and Subwoofer light on)
(Display backlight off and Subwoofer light off)
Notes:
z During battery/DC operation, the unit will be set to Demo mode
off with display and subwoofer light in MODE 2 to reduce the
battery power consumption.
z During MODE 2, press any button to light up the display
backlight for a few seconds.
Volume auto fade-in
If you turn off and on the main unit with the volume set to 27 or
higher, the volume starts at 16 and fades in to the last set level.
Volume control
Press VOLUME +/– buttons (on main unit) or VOL +/– (on remote
control) to increase or decrease the volume.
Direct key power on function
When you press any of the following buttons, the unit turns on.
z iPod / , CD / , USB / on the main unit or the remote
control: selected function is activated.
z TUNER/AUDIO IN on the main unit: last tuner or audio function
is activated.
z TUNER or AUDIO IN on the remote control: the unit turns on
with the selected function activated.
$XWRSRZHURIIIXQFWLRQ
The main unit will enter the stand-by mode (when iPad, iPod,
iPhone, guitar or microphone is not connected) after 15 minutes
of inactivity during:
iPod: Not docked.
Audio In: No detection of input signal.
CD: In the stop mode or no disc.
USB: In the stop mode or no media.
Note:
However, if iPod or iPhone is docked, the unit will begin charging.
“iPod CHARGING” will be displayed.
Auto resume function
The auto resume function will resume the last function and
playback, should there be a power failure or the AC power lead
becomes disconnected. However, CD/MP3 programme and
random mode are not memorised.
Equaliser
When the EQ/(X-BASS) button is pressed, the current mode
setting will be displayed. To change to a different mode, press
the EQ/(X-BASS) button repeatedly until the desired sound mode
appears.
ROCK
FLAT
VOCAL
HIP HOP
REGGAE
SALSA
No equalisation.
For rock music.
Vocals are enhanced.
For hip hop music.
For salsa music.
For reggae music.
Muting
The volume is muted temporarily when pressing the button on
the remote control. Press again to restore the volume.
X-Bass control
When the power is fi rst turned on, the unit will enter the extra bass
mode which emphasises the bass frequencies, and “X-BASS” will
appear. To cancel the extra bass mode, press the EQ/(X-BASS)
button. The last equaliser mode will turn on.
To turn on the X-Bass mode again, press the EQ/(X-BASS) button
for more than 2 seconds.
Setting the clock (Remote control only)
In this example, the clock is set for the 24-hour (0:00) display.
1 Press the ON/STAND-BY button to turn the power on.
2 Press the CLOCK/TIMER button.
3 Within 10 seconds, press the ENTER button. To adjust the
time, press the
or button and then press the
ENTER button.
4 Press the or button to select 24-hour or 12-hour
display and then press the ENTER button.
The 24-hour display will appear.
(0:00 - 23:59)
The 12-hour display will appear.
(AM 12:00 - PM 11:59)
The 12-hour display will appear.
(AM 0:00 - PM 11:59)
GX-M10H_OM_UK_SCA.indd Sek1:6GX-M10H_OM_UK_SCA.indd Sek1:6 2012-08-17 00:07:442012-08-17 00:07:44


