5
Connecting iPod or iPhone to TV
Photo and video fi les from iPod or iPhone can be viewed by
connecting the system to TV/monitor.
If the TV/monitor has a video input, connect it to the VIDEO OUT
socket at the back of the unit and set the TV Out on the iPod or
iPhone unit to “ON” position.
Note:
Please make sure to set iPod unit to either NTSC or PAL to
match your TV signal. Please visit Apple’s homepage for further
information.
Remote control
Battery installation
1
Open the battery cover.
2
Insert the supplied battery according to the terminal indicated
in the battery compartment.
When inserting or removing the battery, push it towards the (–)
battery terminals.
3
Close the cover.
Caution:
z Remove the battery if the unit will not be used for a long period of
time. This will prevent potential damage due to battery leakage.
z Do not use rechargeable battery (nickel-cadmium battery, etc.).
z Installing the battery incorrectly may cause the unit to
malfunction.
z Batteries (battery pack or batteries installed) shall not be
exposed to excessive heat such as sunshine, fi re or the like.
Notes concerning use:
z Replace the battery if the operating distance is reduced or if
the operation becomes erratic. Purchase an “AA” size battery
(UM/SUM-3, R6, HP-7 or similar).
z Periodically clean the transmitter on the remote control and the
sensor on the unit with a soft cloth.
z Exposing the sensor on the unit to strong light may interfere
with operation. Change the lighting or the direction of the unit
if this occurs.
z Keep the remote control away from moisture, heat, shock, and
vibrations.
Test of the remote control
Check the remote control after checking all the connections.
Point the remote control directly at the remote sensor on the unit.
The remote control can be used within the range shown below:
REMOTE
SENSOR
TIMER
Remote sensor
0.2 m - 6 m
(8” - 20’ )
Note:
Exposing the infrared remote control to direct sunlight may cause
the remote control to be inoperable.
Carrying the unit
Caution:
Before transporting the unit, remove the iPod, iPhone,
iPad, USB memory device and disc from the unit. Then,
set the unit to the power stand-by mode. Transporting the
unit with iPod, iPhone, iPad or USB memory device left
connected or discs left inside might damage the unit.
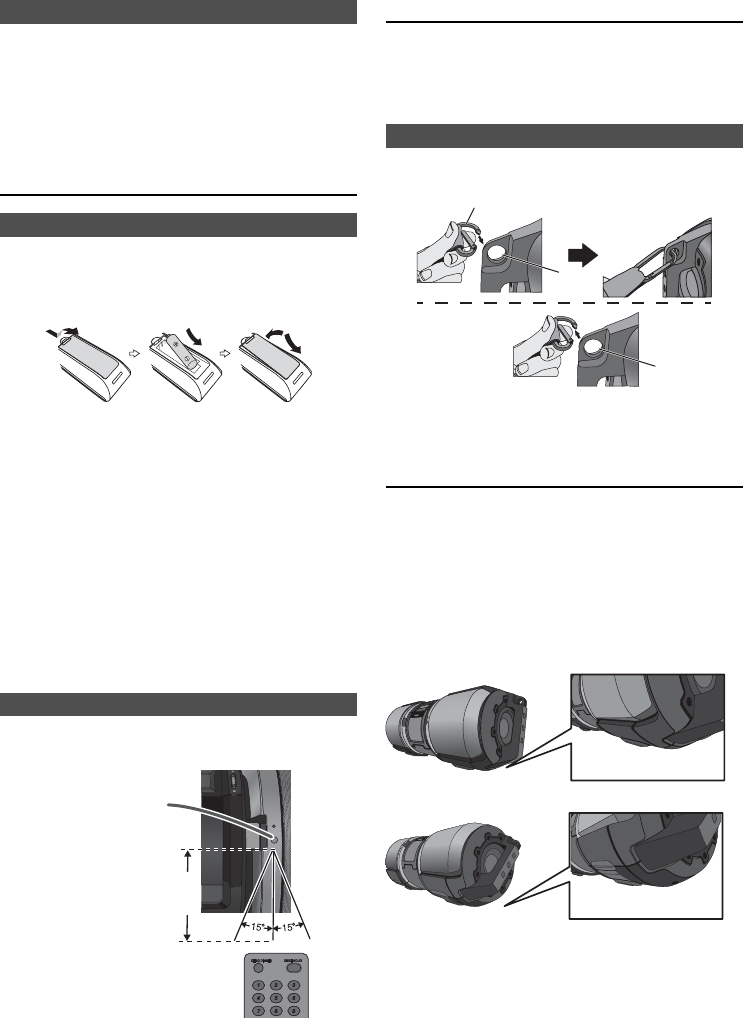
Using the carrying strap
This unit can be carried by using a supplied carrying strap.
Insert the carrying strap carabiner (hook) to each end of
the unit as shown below.
Hole
To remove the
carrying strap
Carabiner (hook)
Hole
Caution:
Before carrying the unit, make sure the carabiner (hook)
is properly secured and closed, otherwise it will cause
damage and injury.
Placing the unit
This unit can be placed in 2 positions as shown below.
Caution:
z Make sure that the unit is placed on a fl at and level
surface.
z Make sure to turn the unit carefully when adjusting the
position.
z Do not place the unit other than these 2 positions to
avoid damage and injury.
To get the best display viewing angle, place the unit
as below.
Position 1:
On the shelf/table.
T
RO
P
AB
L
E
MI
SU
OB
C
MO
BG
X
O
X-M10
Foot cushion 1 and 2
touching the surface.
Position 2:
On the fl oor/ground
O
PRT
AB
L
E
I
S
U
M
B
C
O
OM
BOX
G
X-M
1
0
Foot cushion 2 and 3
touching the surface.
GX-M10H_OM_UK_SCA.indd Sek1:5GX-M10H_OM_UK_SCA.indd Sek1:5 2012-08-17 00:07:432012-08-17 00:07:43


