


Masterpage:Right-NoTitle0
EN
41
Filename [DVS3U_1a-EN.fm]
Page 41 January 14, 2002 11:07 am
Recording Features
(DV deck)
Second Audio Recording
This VCR’s built-in MTS decoder enables reception of
Multichannel TV Sound broadcast. To record a SAP
program received, set “2ND AUDIO RECORD” to “ON”.
(
੬
pg. 71)
NOTES:
When the channel is changed on the VCR;
●
The “STEREO” indicator appears on the screen for about
5 seconds if the program is a stereo broadcast.
●
The “SAP” indicator appears on the screen for about
5 seconds if the program is a SAP broadcast.
●
Both indicators appear when a stereo program is accompanied
by SAP sound.
Record One Program While Watching
Another
Once recording is in progress, all you need to do is to set
the channel controls on the TV for the station you wish to
view.
●
The program selected with the TV’s channel controls appears
on the TV screen, while the one selected with the VCR’s CH
buttons is recorded on the tape.
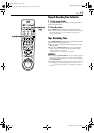
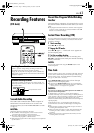
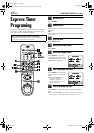
Instant Timer Recording (ITR)
This easy method lets you record for from 30 minutes to 2 hours
(selectable in 30-min. increments), and shuts the VCR off after
recording is finished.
1
Start recording.
Press REC (
7
) on the VCR.
2
Engage the ITR mode.
Press REC (
7
) again. “
o
” blinks and “0:30” appears on
the front display panel.
3
Set the recording duration.
If you want to record for more than 30 minutes, press
REC (
7
) to extend the time. Each press extends recording
time by 30 minutes.
NOTE:
You can only perform ITR using the REC (
7
) button on the
VCR’s front panel.
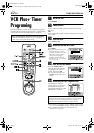
Time Code
During recording, a time code is recorded on the tape. This time
code is used to confirm the position on the tape when playing
back or editing a tape. To perform Random Assemble Editing
(
੬
pg. 64), time code is necessary.
Press DISPLAY/OSD until the time code on the tape
appears on the front display panel.
●
By pressing the DISPLAY/OSD button, you can change the
display to show the time code, channel position*, clock time.
* Channel position is not displayed during playback.
NOTES:
The presence of a blank (unrecorded) portion in the middle of a
tape can result in misoperation.
A “blank portion” of a tape is a section where nothing is
recorded on the tape. If you start recording in a blank portion of
a tape, the time codes will start from “0:00:00” again. If identical
time codes are recorded in two different places on a tape,
Random Assemble Editing and other similar functions might not
operate properly.
In the following cases, you should play back the tape and
confirm where a scene ends, and then begin recording from
there:
●
When starting recording in the middle of a tape on which a
recording has already been made.
●
When you finish recording on a tape, then played back that
recording in order to check it, and now wish to continue
recording.
●
When you lost power or the batteries died while you were
recording with a camcorder.
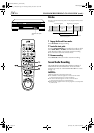
Recording Resume Function
If there is a power outage during recording, Instant Timer
Recording (in the right column) or timer recording
(
੬
pg. 42, 46, 48), the recording will resume automatically
when power is restored to the VCR unless the VCR’s memory
backup has expired.
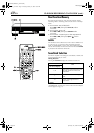
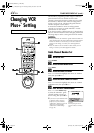
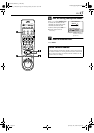
Accidental erasure prevention
To prevent accidental recording on a recorded cassette, set
its erase protection switch to “SAVE”. To record on it later, set
the switch to “REC”.
1
32
123
456
7
89
0
2
4
T W
Erase protection switch
DVS3U_1a-EN.fm Page 41 Monday, January 14, 2002 11:08 AM