


TASCAM HD-P2 Owner's Manual 21
Timecode
Timecode
Overview
The HD-P2 has a wide range of timecode features.
It can read incoming linear timecode (LTC) and has
many functions including freewheeling, trigger on
frame number, and timecode offset. The HD-P2 can
also resolve its audio clock to a range of sources
including LTC in and video in.
Very briefly, timecode operation works this way
(details in the following sections):
1. Enable timecode on the
Project Menu/Settings
screen.
2. Adjust the timecode settings as needed.
3. Go into timecode chase mode by pressing the
TIMECODE
key. The
TIMECODE
indicator will reflect the
state of incoming timecode (blinking if there is no
timecode, solid with good timecode). The position
on the audio timeline is now controlled by the LTC.
4. Start a timecode operation by pressing the
PLAY
or
REC
key. The
REC
indicator will blink until the op-
eration is triggered by incoming timecode. Once
triggered, any blinking light will stay on solid.
5. The operation is stopped when the
STOP
key is
pressed, or if power or storage space is low, or if
LTC has hit the end of its 24-hour timecode day. If
FreeWheel is not infinite (see below), then the op
-
eration will also stop if timecode is stopped.
6. Leave timecode chase mode by pressing the
TIMECODE
key. The
TIMECODE
indicator goes out and
the transport keys and the
SHUTTLE/DATA
wheel once
again control the position on the audio timeline.
7. When timecode is disabled on the Project Menu/
Settings screen, the
TIMECODE
key is no longer ac-
tive.
There are many variations to how timecode works on
the HD-P2, as controlled by the Timecode Settings
screen.
Continued on the next page
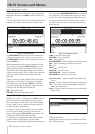
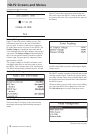
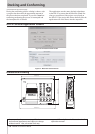
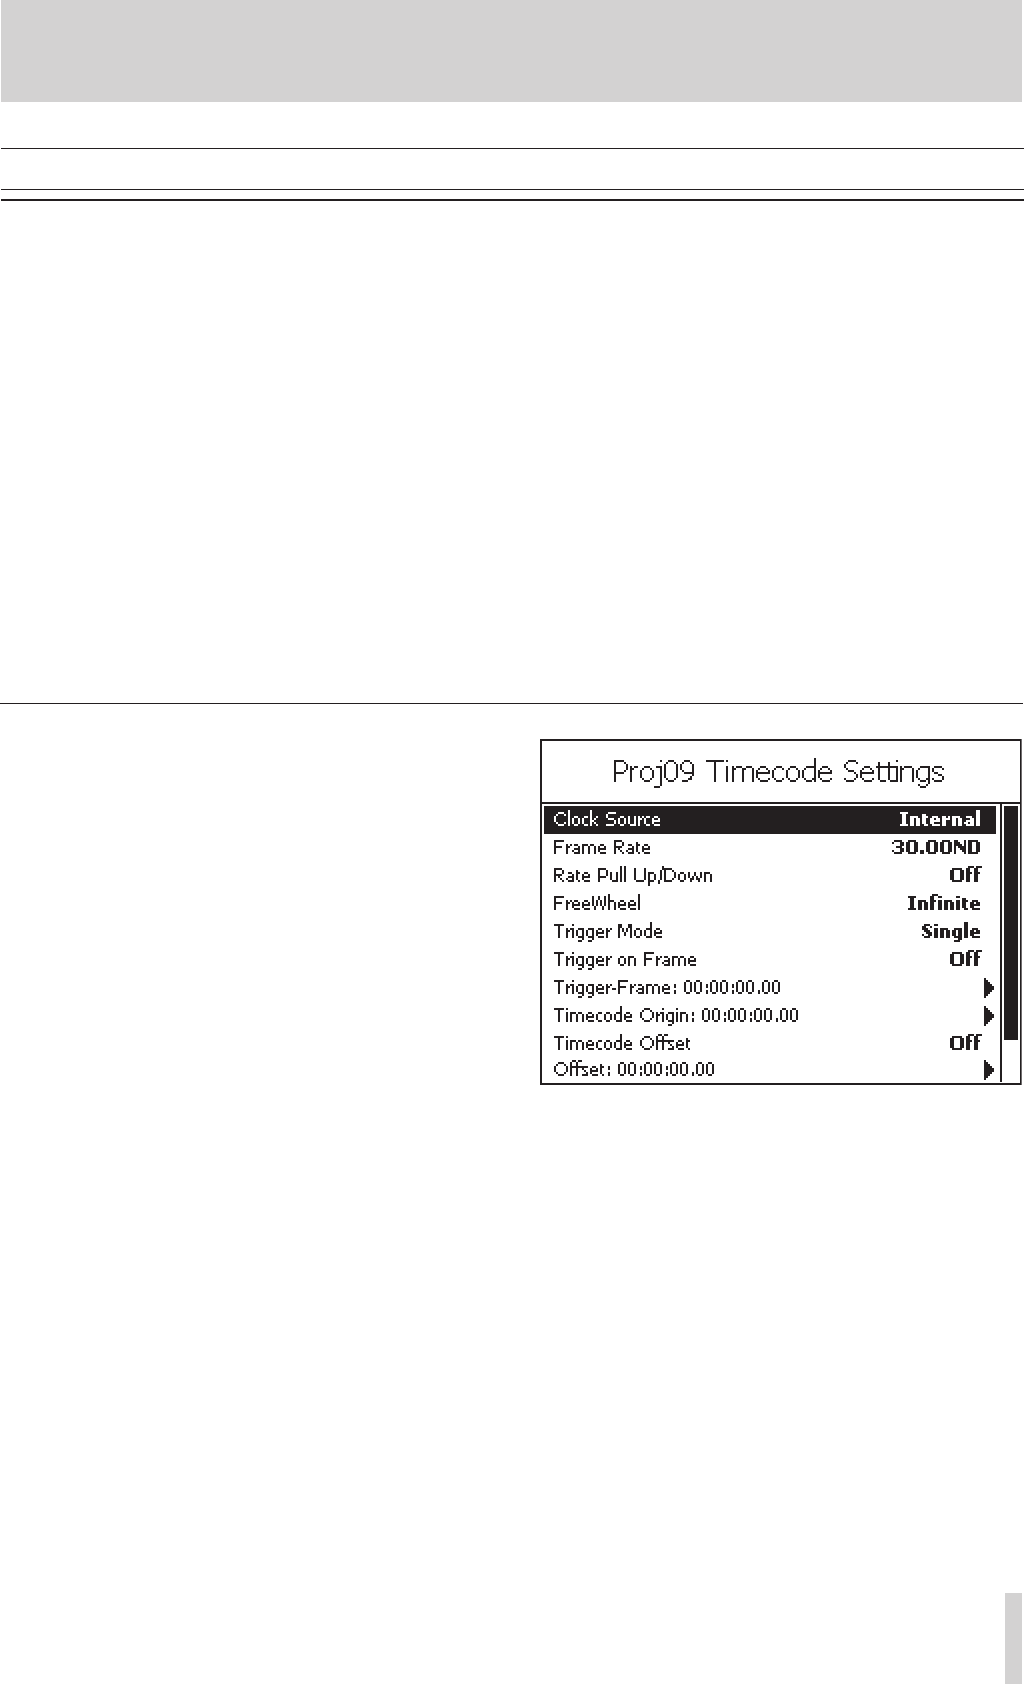
Timecode Settings
Figure 33 - Timecode Settings Screen
Timecode operation on the HD-P2 is disabled by
default. You cannot access the Timecode Settings
menu screen until timecode is enabled. Go to the
Project Menu/Settings screen, select the Timecode
menu item and change it from
DIS
to
EN
to enable
timecode. Then select the Timecode Settings menu
item and press the
SELECT
key to enter the Timecode
Settings screen which looks similar to Figure 33.
Clock Source
This menu item is a duplicate of the
Clock Source
field
on the Project Menu/Settings screen. There is only one
audio clock source and changing either one affects the
other. This menu is included in the Timecode Settings
for convenience.
The possible audio Clock Source values are:
•
Internal
– The audio clock is crystal-controlled
and generated by the HD-P2. Use this only if the
HD-P2 is to be the audio clock master in your sys
-
tem, with its S/PDIF digital audio output used to
synchronize other audio gear.
•
LTC
– The HD-P2 will lock its audio clock to the in-
coming LTC, always keeping it in sync to the LTC
rate. Please note that even with the audio clock rate
locked to incoming LTC, the audio clock can still
“drift” with respect to the LTC if it is discontigu
-
ous or if there is a mismatch between the expected
and received LTC formats (e.g. drop vs. non-drop
frame).
•
Video
– A variety of video formats can be fed into
the BNC input and used for audio sync, including
composite or blackburst NTSC and PAL, and tri-
level sync from HDTV systems. Note that the
Frame Rate (described below) must be correctly set
to match the incoming video material.
•
Word Clock
– The BNC input can also be sent a stan-
dard TTL-level word clock for audio clock sync.
•
S/PDIF
– The audio clock rate can also be derived
from an incoming S/PDIF digital audio signal.
The audio clock source and frame rate must be set cor-
rectly and fed valid signals to avoid “drift” between
the LTC and the audio clock.
Frame Rate
This field lets you specify the expected incoming LTC
(and video) frame rate, as well as frame encoding in
Drop Frame (DF) and Non-Drop (ND) frame systems.
•
23.976
– Some HDTV setups use a “pull-down” ver-
sion of 24 frame-per-second video. While the video
runs at a slowed down rate, the frames are always
“non-drop” frame encoded.