Setup
25
Overview Quick Guide Getting Ready IN/OUT/Monitor
Recording/Playback
Mixer Timecode File Operation USB Appendix
Turning the Power On/O
* Once everything is properly connected (p. 28, p. 32), be sure to
follow the procedure below to turn on their power. If you turn
on equipment in the wrong order, you risk causing malfunction
or equipment failure.
Slide the [POWER] switch in the
direction of the arrow and hold
it there for several seconds to
turn the power on/o.
When you turn on the power, the start-up screen will appear in the
display, and then the home screen will appear.
* This unit is equipped with a protection circuit. A brief interval (a
few seconds) after turning the unit on is required before it will
operate normally.
* Before turning the unit on/o, always be sure to turn the volume
down. Even with the volume turned down, you might hear some
sound when switching the unit on/o. However, this is normal
and does not indicate a malfunction.
Preventing the Power from
Automatically Turning O (AUTO OFF)
The power to this unit will be turned o automatically
after a predetermined amount of time has passed since its
buttons or controls were last operated (AUTO OFF function).
If you do not want the power to be turned o automatically,
disengage the AUTO OFF function as follows.
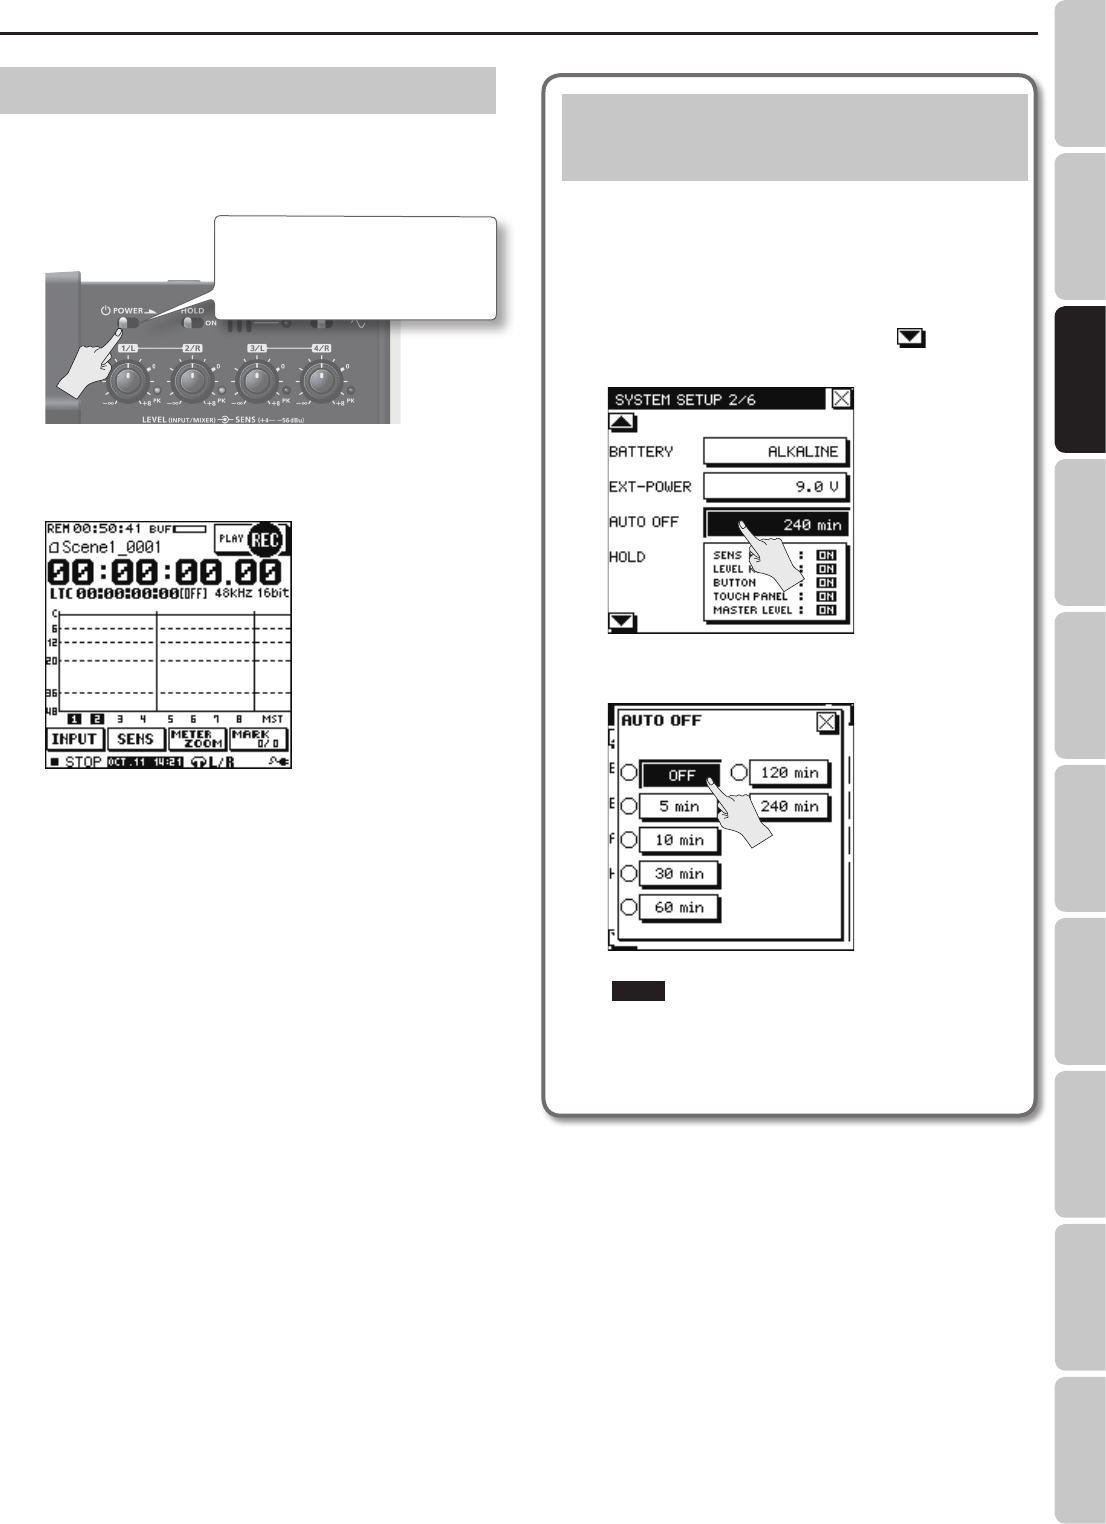
1. Choose [MENU]Ú<SYSTEM SETUP>Ú<AUTO OFF>.
<AUTO OFF> is located on page 2/6. Touch to access
2/6.
2. Touch <OFF>.
NOTE
• Any settings that you are in the process of editing will be
lost when the power is turned o. If you have any settings
that you want to keep, you should save them beforehand.
• To restore power, turn the power on again.


