


Appendix B StorNext Administration Tasks
Connecting to a StorNext Network Using Xsan 1.4.2
StorNext 3.1.3 Installation Guide 116
Connecting to a StorNext Network Using Xsan 1.4.2
If you are using Apple Xsan 1.4.2, follow the procedure below to connect
to a StorNext network. The procedure consists of mounting the StorNext
file system onto the OSx computer, and then creating an automount.plist
to enable mounting the StorNext file system whenever the Macintosh is
rebooted.
Do not use the procedure if you are using Xsan2, which has a slightly
different procedure described in
Connecting to a StorNext Network
Using Xsan 2 on page 119.
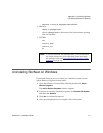
Mounting SNFS on the
OSx Computer 2
Follow this procedure to mount the StorNext file system.
1 Connect the Apple computer to the SAN's metadata Ethernet and
Fibre Channel networks.
2 Install Xsan 1.4.2 software on the Apple computer.
3 After Xsan 1.4.2 is installed, follow these steps to configure the
software:
a On the Apple client, open Xsan Admin, which is located under
the Finder > Applications > Server folder, and then connect to
the Apple computer.
b Select the SAN in the SAN Components list.
c Click Setup, and then click Computers.
d Double-click the client in the list (located in the center of the
window).
e Enter the Xsan serial number (printed on a sticker on the Xsan
Installation disc sleeve).
f Click Save, and then quit Xsan Admin.
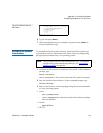
4 Navigate to an existing StorNext client on the SAN and print a copy
of its fsnameservers file.
On Unix: the fsnamerservers file is located at /usr/cvfs/config/.