


EN 35
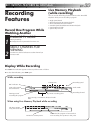
Simple
Recording
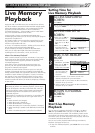
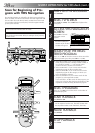
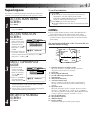
LOAD A CASSETTE
1
Insert a VHS (or S-VHS) cassette with the record safety
tab intact.
If you want to use VHS Navigation to select the pro-
gram after recording with this unit, set “VHS
NAVIGATION” to “ON” in VHS SET UP 1 of Main
Menu before recording. For details, see the next
page.
SELECT VHS DECK
2
Press VHS (or S-VHS). The S-VHS button lights on the
front panel.
SELECT RECORDING
CHANNEL
3
Press CH +/–. Or press the appropriate NUMBER keys,
then press ENTER. (The channel changes after a few
seconds whether you press ENTER or not.)
SET TAPE SPEED
4
Press REC SPEED to select the recording speed from SP
or EP.
START RECORDING
5
Press and hold REC and press PLAY on the remote
control, or press REC on the recorder’s front panel. The
VHS recording indicator lights on the front panel.
Video Calibration takes place at the beginning of
both the first SP and the first EP recording after
inserting the cassette (when Video Calibration is set
to “ON” ੬ pg. 47).
PAUSE/RESUME
RECORDING
6
Press PAUSE. Press PLAY to resume recording.
● During record pause, you can change the recording
channel by using the CH +/– buttons or NUMBER keys.
Video Calibration will not take place if the tape
speed is changed while in record pause mode.
STOP RECORDING
7
Press STOP. Then press EJECT on the VHS to remove
the cassette.
NOTE:
●
It is not possible to record a TV program on both the VHS
deck and the HDD deck simultaneously.
In addition, it is not possible to record simultaneously from
the same external input.
Turn on the TV and select the AV mode.
If the recorder is turned on with HDD deck selected, there
may be about 30 seconds' delay in starting to show pictures
on the screen.
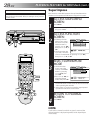
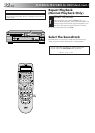
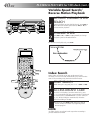
DIGITPURE TECHNOLOGY
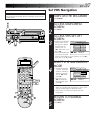
HM-HDS1
POWER
S-VHS ET
S-VHS
HDD
OK
MENU
REC LINK
CH
NAVI
STOP PLAY PAUSE REC
REW FEW
A. DUB
EJECT
VIDEO
PAUS E
S-VIDEO
(M) L – AUDIO – R
F - 1
123
4 56
789
0
2
1
4
3
>
<
1
2
–
+
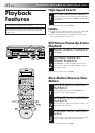
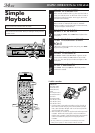
S-VHS
EJECT
STOP
CH+/–
STOP
NUMBER
PLAY
REC
CH+/–
ENTER
REC
PLAY
PAUSE
VHS
REC SPEED
PAUSE