


a diskette drive attached through the external diskette drive
connector.
Warning: Make sure that the diskette does not have
more than one label attached to it. Multiple labels can
cause damage to the drive or can cause the drive to fail.
Do the following to select the test device:
1. Select the advanced diagnostics mode and select
Tool; then select the FDD-1 or FDD-2 icon and press
the spacebar. A √ mark appears next to the selected
icon. Insert a blank diskette when instructed.
2. Run the diskette drive test.
3. If the controller test detects an error, FRU code 10
appears. Replace the system board.
4. If the controller test runs without errors, the drive
read/write tests start automatically.
5. If the drive test detects an error, FRU code 50 for
FDD-1 or 51 for FDD-2 appears. If the diskette itself
is known to be good, replace the drive.
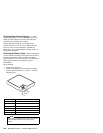
Status Indicators Checkout
If a status indicator LED problem occurs, do the following:
1. Power off the computer.
2. Power on the computer.
3. All the LEDs in the status indicator panel turn on for a
moment soon after the computer is powered on.
Verify that all indicators turn on correctly.
If some of the indicators do not turn on, replace the LED
indicator card.
If the problem still remains, replace the keyboard card.
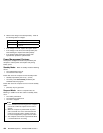
Power Systems Checkout
To verify the symptom of the problem, power on the
computer using each of the power sources as follows:
1. Remove the battery pack, diskette drive, and hard
disk drive.
2. Connect the AC Adapter and check that power is
supplied.
3. Install the diskette drive or hard disk drive one at a
time, and check that power is supplied from each
power source.
4. Disconnect the AC Adapter, remove the hard disk and
diskette drive, and install the charged battery pack;
then check that power is supplied by the battery pack.
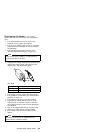
If you suspect a power problem, see the appropriate power
supply check listed below.
“Checking the AC Adapter” on page 101.
“Checking Operational Charging” on page 102.
“Checking the Battery Pack” on page 102.
“Checking the Backup Battery” on page 103.
100 IBM Mobile Systems - ThinkPad HMM Volume 3