


TASCAM DR-701D
9
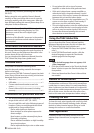
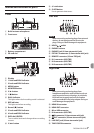
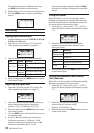
6 Recording setting status
: Recording off
: Recording on
7 Phantom power status
No icon: Phantom power off
: Phantom power on
8 MIX recording setting status
: MIX recording setting off
: MIX recording setting on
9 Level meters
These show the levels of input or playback
signals.
0 Remaining time
This shows the elapsed time (hours: minutes) of
the current file.
When recording, the remaining recording time
on the SD card is shown in hours and minutes
according to the set recording mode, sampling
frequency and recording format.
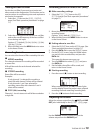
q Peak values in decibels (dB)
During playback, the maximum level that occurs
in a fixed period of time is displayed in decibels
for each channel.
During recording, peak input levels are shown in
decibels.
w Project name
This shows the name of the project being
recorded or played.
A project is a group of files used for recording/
playback.
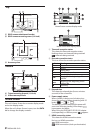
e Trim levels
These show the trim levels of knobs 1, 2, 3 and 4.
r GANG status
This shows the GANG status of knobs 1, 2, 3 and
4.
: Set to GANG group 1
: Set to GANG group 2
Preparation
Powering the unit
8
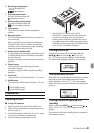
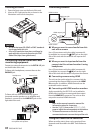
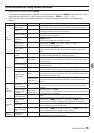
Using AA batteries
1. Open the front cover on the front of the unit.
2. Pull the lever on the battery compartment cover
down to open it.
3. Install 4 AA batteries with their ¥ and ^ marks
as shown in the battery compartment.
4. Close the battery compartment cover.
• Use the
BATTERY
item on the
POWER
MANAGEMENT
page to set the type of battery
in order to accurately show the amount of
battery power remaining and allow the unit to
accurately determine whether enough power is
available for proper operation. (By default, this is
set to
ALKALI
for alkaline batteries.)
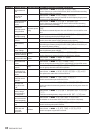
Turning the unit on
To start the unit when off (in standby), slide the
HOLD/ switch toward until
TASCAM
DR-701D
(start-up screen) appears on the display.
The Home Screen appears after the unit starts up.
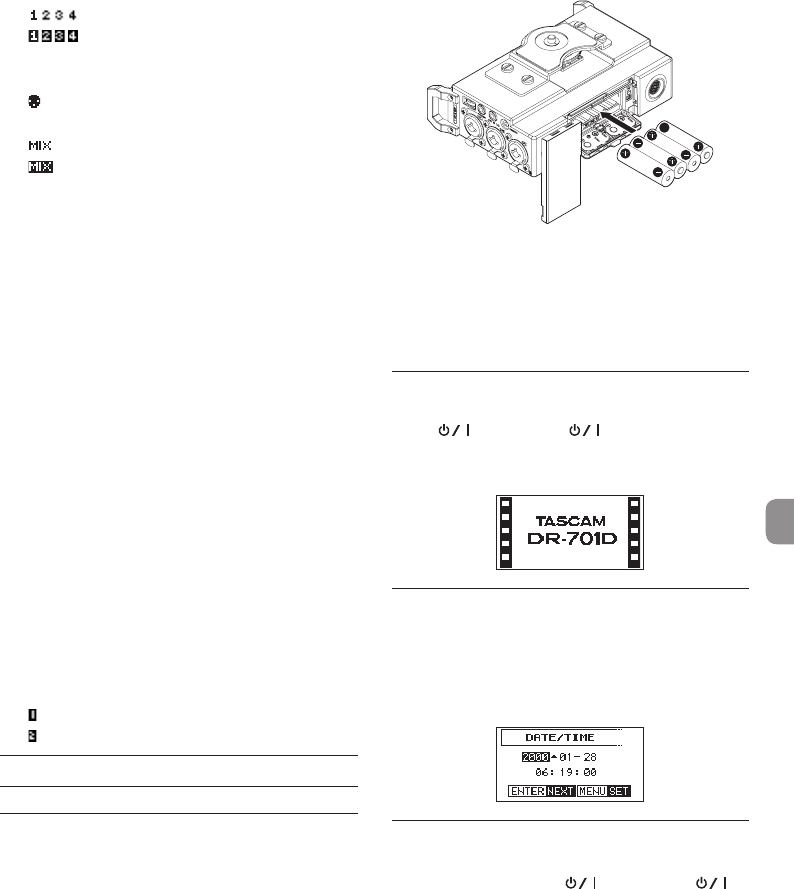
Setting the built-in clock
When the unit is started up for the first time (or when
the built-in clock is reset after being left unused
without batteries), the
DATE/TIME
screen appears
before the start-up screen to allow the date and time
to be set.
Turning the unit off (putting it in
standby)
When on, slide the HOLD/ switch toward
until
LINEAR PCM RECORDER
appears on the
display.
The unit turns off (enters standby) after it completes
its shutdown process.